Overview
The Outlook integration allows your AI agent to:- Read incoming emails from your connected Outlook account.
- Determine if a reply is needed based on the email content.
- Automatically send a reply on your behalf.
Setup Guide
1. Connect Your Outlook Account
First, you need to authorize the application to access your Outlook account.- Navigate to Integrations in the side menu on ConvoCore.
- Locate the Outlook integration card.
- Click Connect on the Outlook card.
- You will be redirected to Microsoft’s login page.
- Sign in with your Microsoft account (Outlook, Office 365, or Microsoft 365).
- Review the permissions requested:
- Read your mail
- Send mail on your behalf
- Manage your mailbox
- Click Accept to authorize the connection.
- You’ll be redirected back to ConvoCore with a confirmation message.

2. Assign Outlook Account to Your Agent
Once your Outlook account is connected, you need to assign it to the specific agent(s) you want to handle your emails. You can do this in two ways:Option 1: From the Integration Tab (Recommended)
This method allows you to assign Outlook accounts to multiple agents at once from a centralized location.- Navigate to Integrations in the side menu on ConvoCore.
- Locate the Outlook integration card and click on it to open the Outlook management modal.
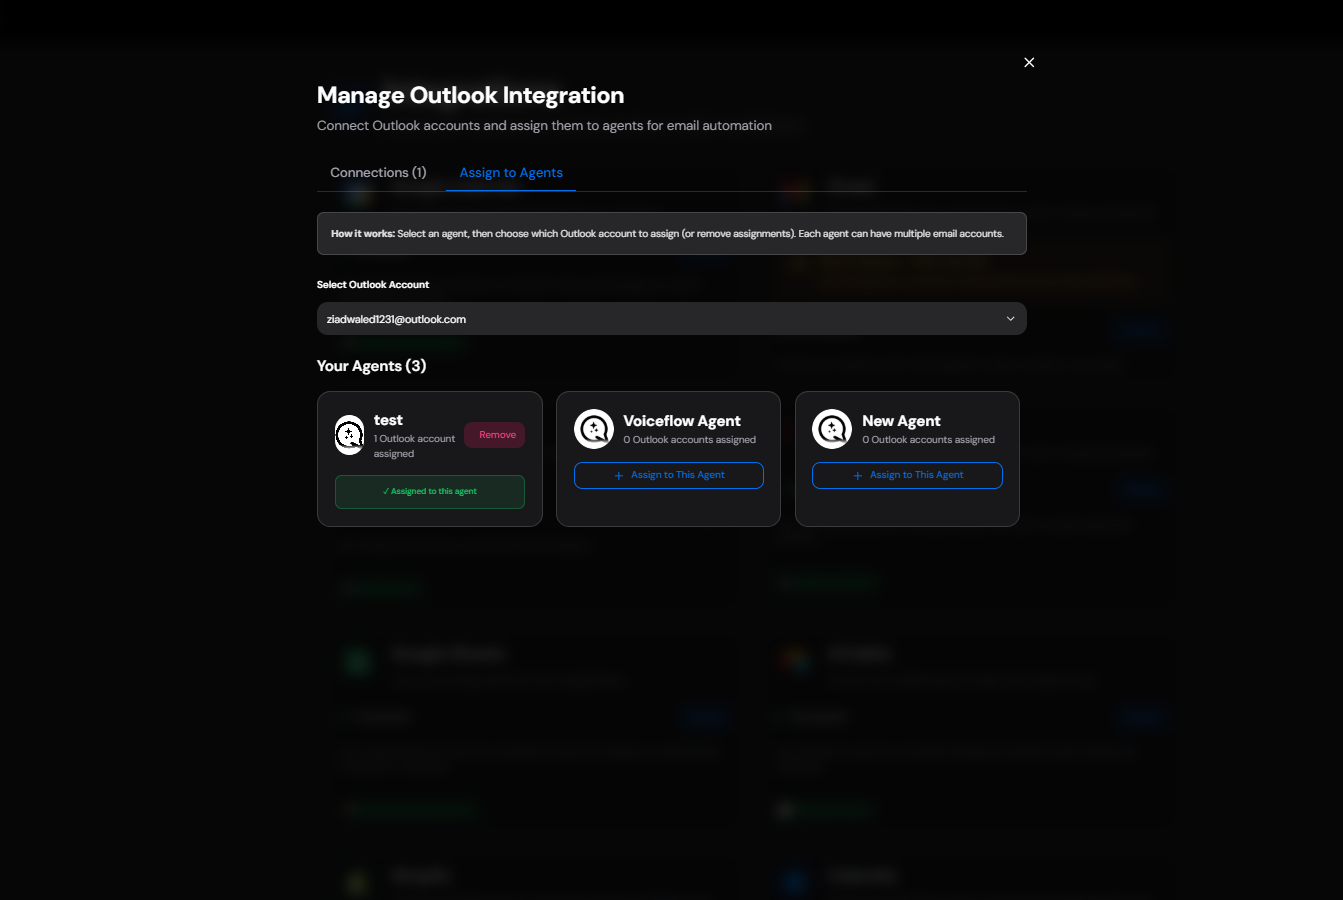
- Click on the Assign to Agents tab at the top of the modal.
- Select the Outlook account you want to assign from the Select Outlook Account dropdown.
- You’ll see a list of all your agents. For each agent:
- If the Outlook account is not yet assigned, click Assign to This Agent to assign it.
- If the Outlook account is already assigned, you’ll see a checkmark and can click Remove to unassign it.
- The assignment is saved automatically. You can assign the same Outlook account to multiple agents if needed.
Option 2: From the Agent Dashboard
This method allows you to configure email settings while assigning the account.- Go to your Agent Dashboard.
- Select the agent you want to configure for email handling.
- Navigate to the Channels tab.
- Look for the Email channel option.
- Click Add Email or the + button to add an email source.
- From the dropdown, select the Outlook account you connected earlier.
- If you have multiple Outlook accounts connected, select the appropriate one.
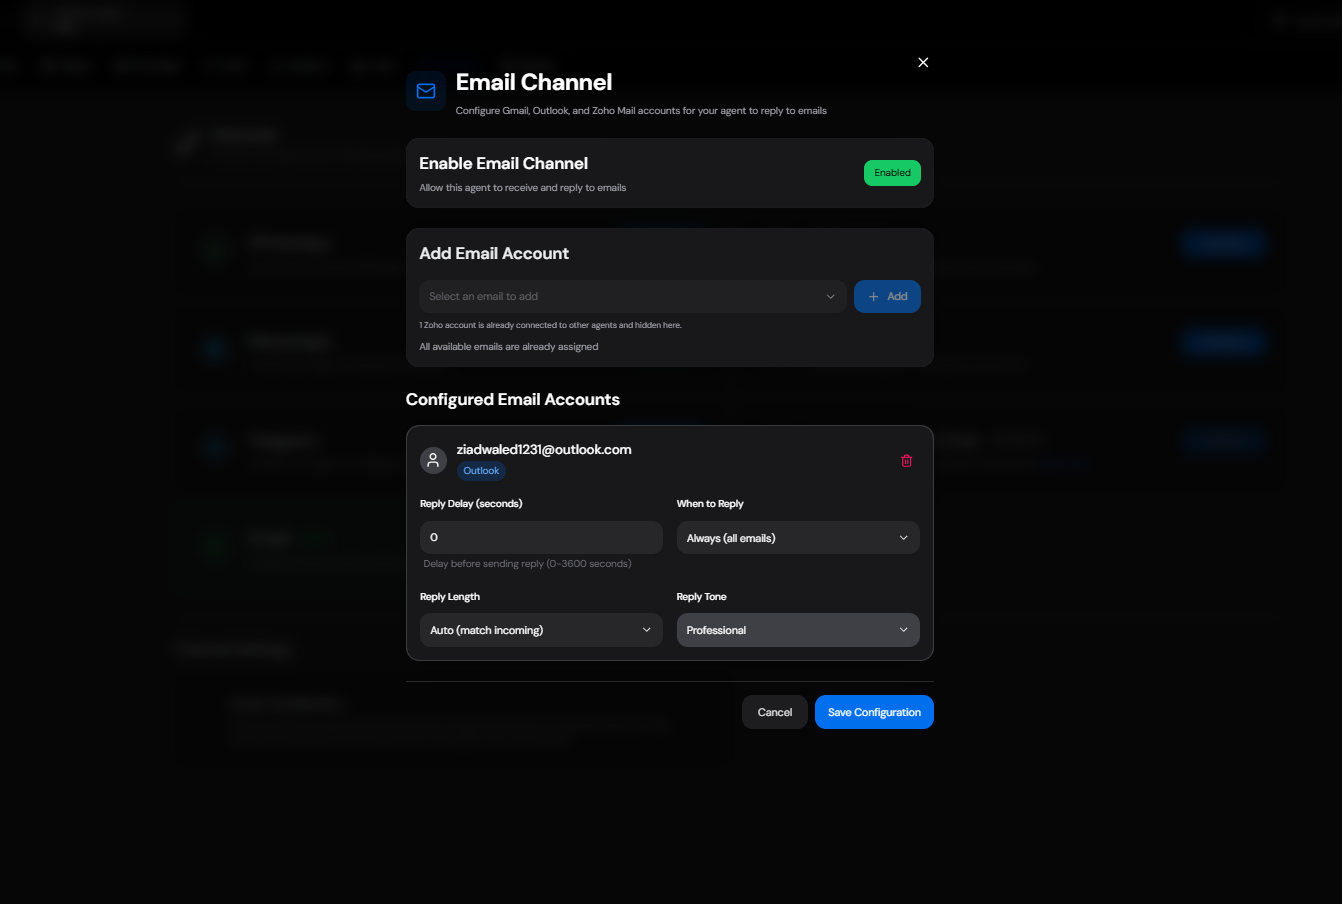
3. Configure Email Channel Settings
After assigning Outlook to your agent (using either method above), you can configure how the agent will handle incoming emails. If you used Option 1 (Integration Tab), you can configure these settings from the Agent Dashboard. If you used Option 2 (Agent Dashboard), you can configure them immediately.Email Configuration Options
Reply Settings:- Reply Delay: Set a delay (in seconds) before the agent sends a reply. This can make the response feel more natural and avoid appearing too automated. Recommended range: 5-30 seconds.
- When to Reply: Choose which emails the agent should reply to:
Always: Reply to every emailSmart Mode: Let the AI determine if a reply is necessaryManual Approval: Flag emails for manual review before replyingSpecific Keywords: Only reply to emails containing certain keywords
- Reply Length: Adjust the length of generated responses:
Short: 1-2 sentencesMedium: 2-3 paragraphsLong: Detailed 3-5 paragraph response
- Reply Tone: Set the tone of the response:
Professional: Formal business toneFriendly: Conversational and warm toneCasual: Relaxed and informal toneCustom: Define your own tone guidelines
4. Enable and Activate
After configuring all settings:- Click Save Configuration to apply your changes.
- You’ll see a confirmation message indicating the Outlook email channel is now active.

Testing Your Setup
- Send a test email to your connected Outlook account from another email address.
- Wait for the configured reply delay.
- Check if the agent has sent a reply.
- Review the reply quality and tone.
- Adjust configuration settings if needed.
Troubleshooting
Agent Not Replying to Emails:- Verify the Outlook account is still connected (check Integrations page)
- Ensure the Email channel is enabled for the agent
- Review the “When to Reply” setting - it may be filtering out emails
- Sign out and reconnect your Outlook account
- Check that your Microsoft account hasn’t revoked permissions
- Ensure your account hasn’t been disabled in Microsoft
- Refresh the page and try again
- Ensure you have the correct permissions for the agent
- Try a different browser or incognito mode
Privacy & Security
- All emails are processed securely and encrypted in transit
- Microsoft Outlook integration uses OAuth 2.0 for authentication
- Your passwords are never stored; only secure tokens are kept
- You can disconnect or revoke access at any time from the Integrations page
Disconnecting Outlook
To disconnect your Outlook account:- Go to Integrations in the side menu
- Find the Outlook card
- Click Disconnect
- Confirm when prompted
- The agent will no longer have access to your Outlook account