Step 1: Create a Facebook App
- Go to developers.facebook.com.
- Create a new app:
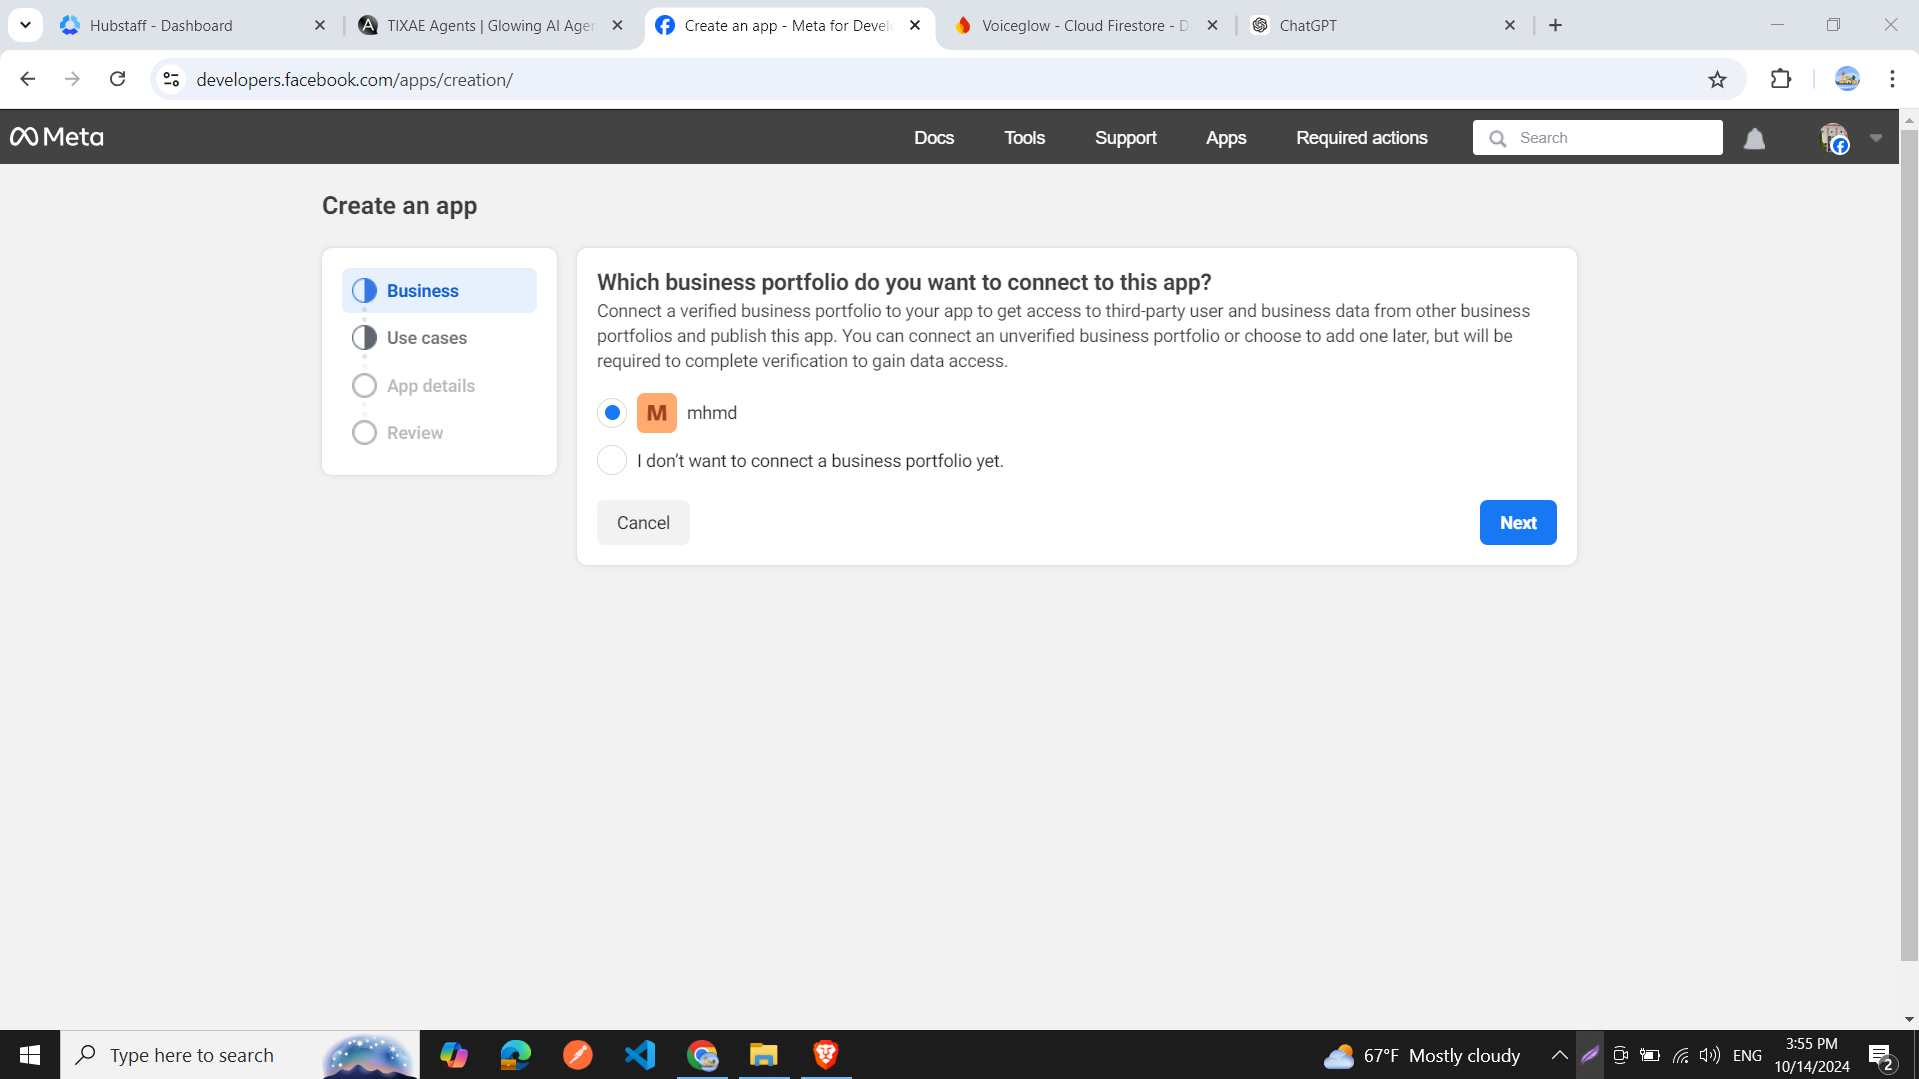
- Select the business portfolio you want to connect the app to and click “Next”.
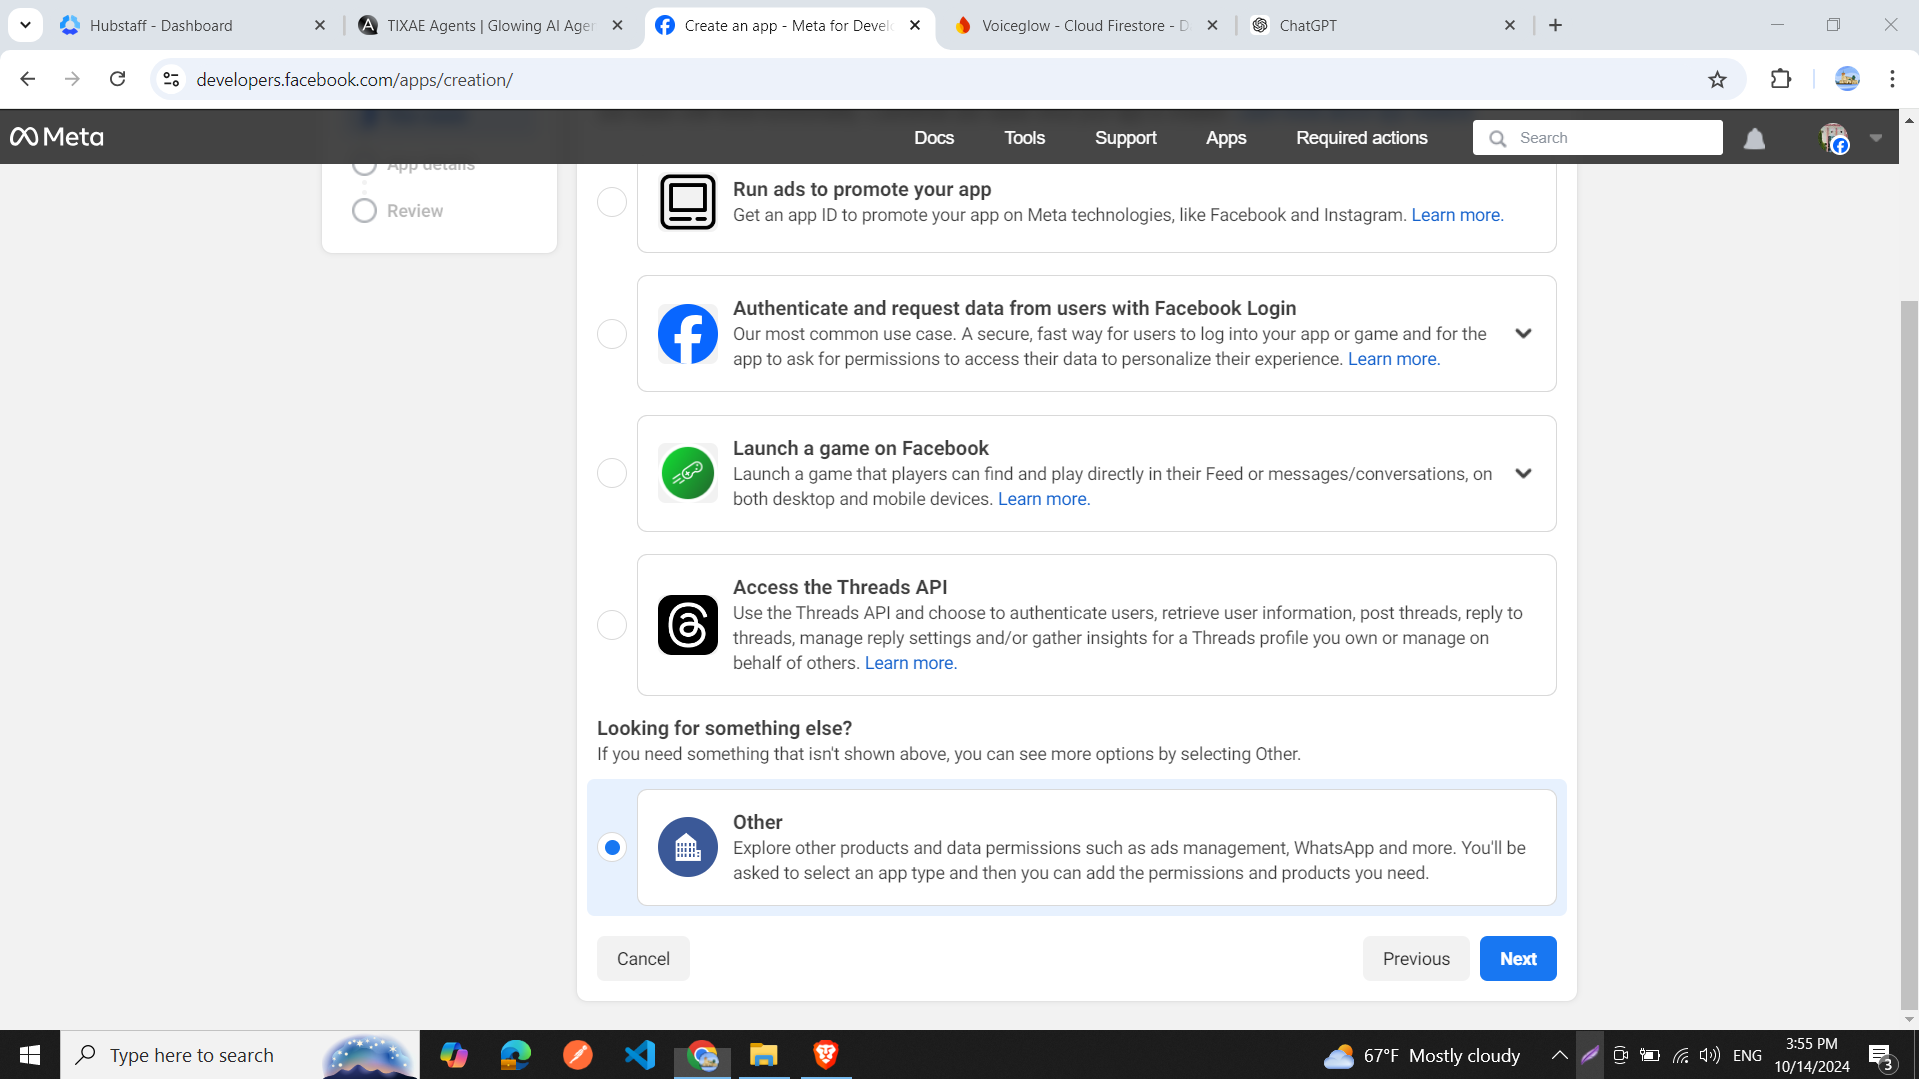
- Choose “Other” as the product type and click “Next”.
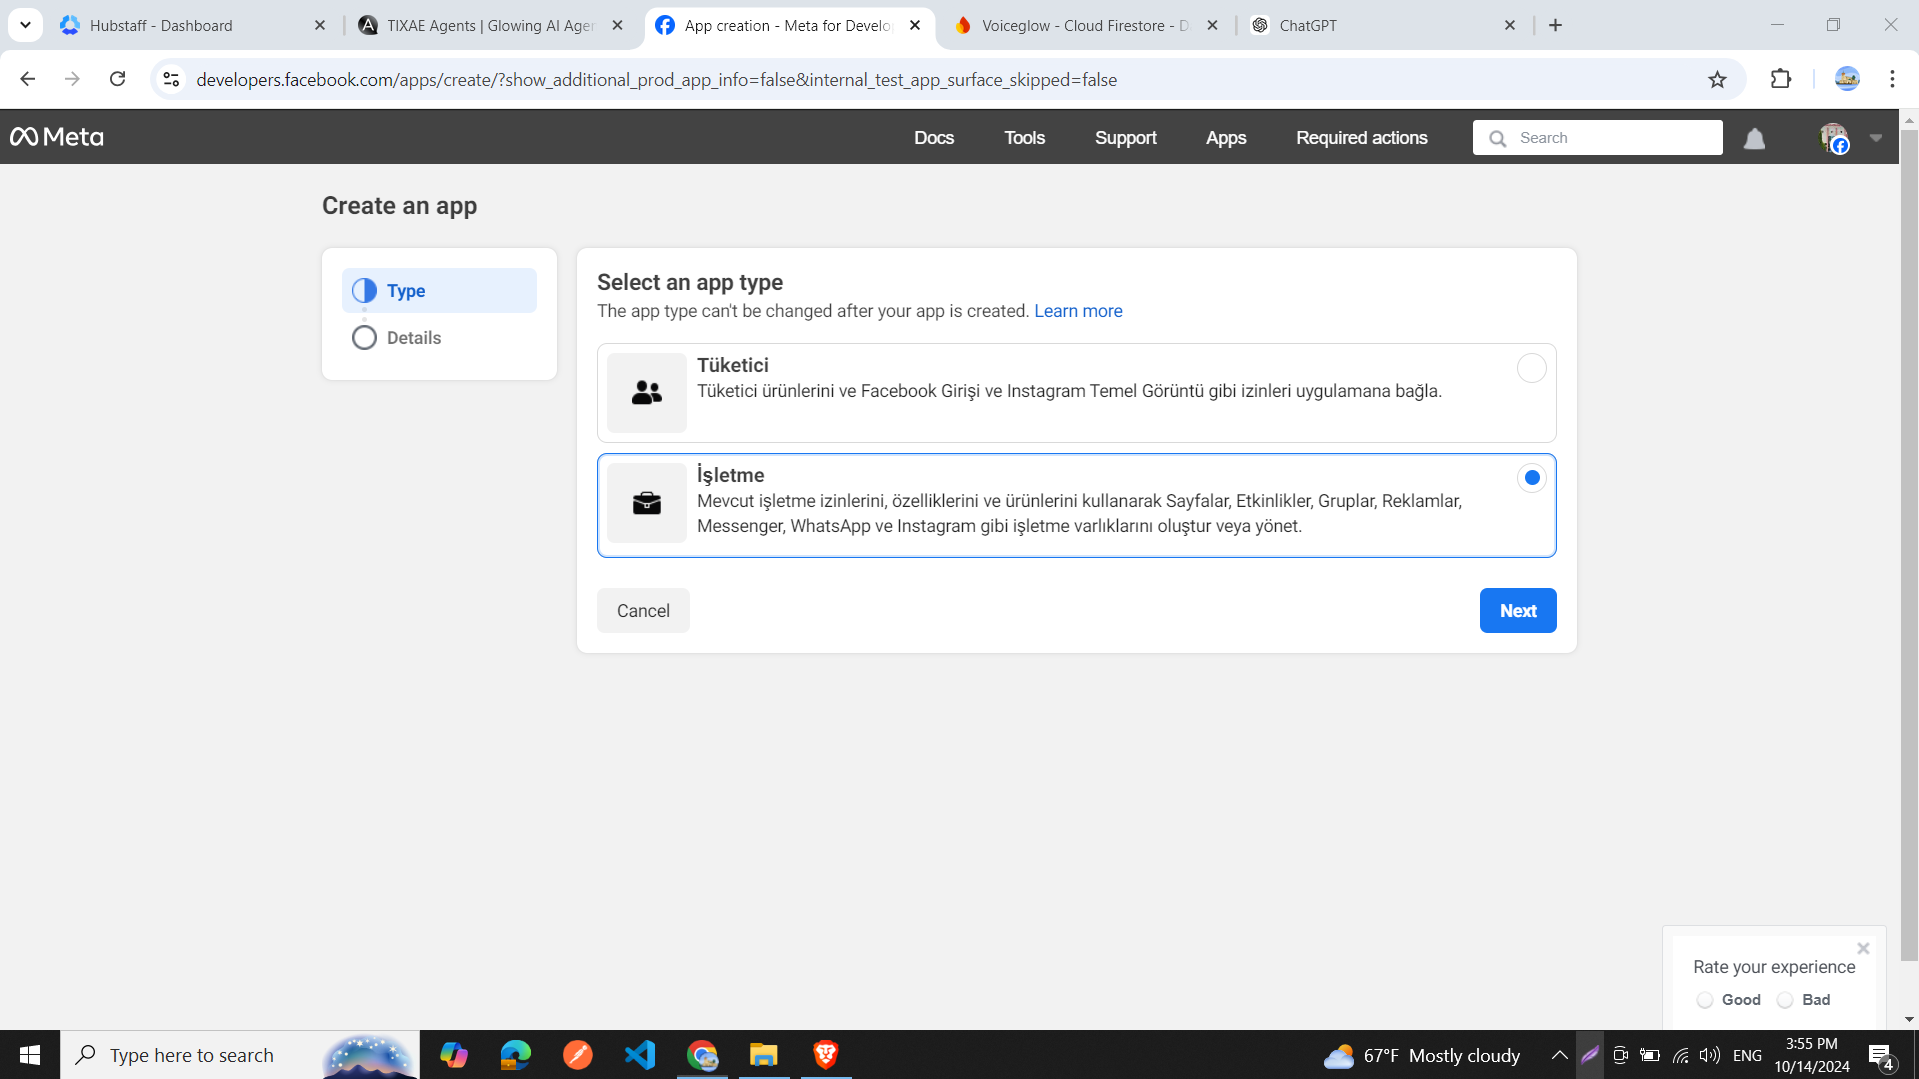
- Select “Business” as the app type and click “Next”.
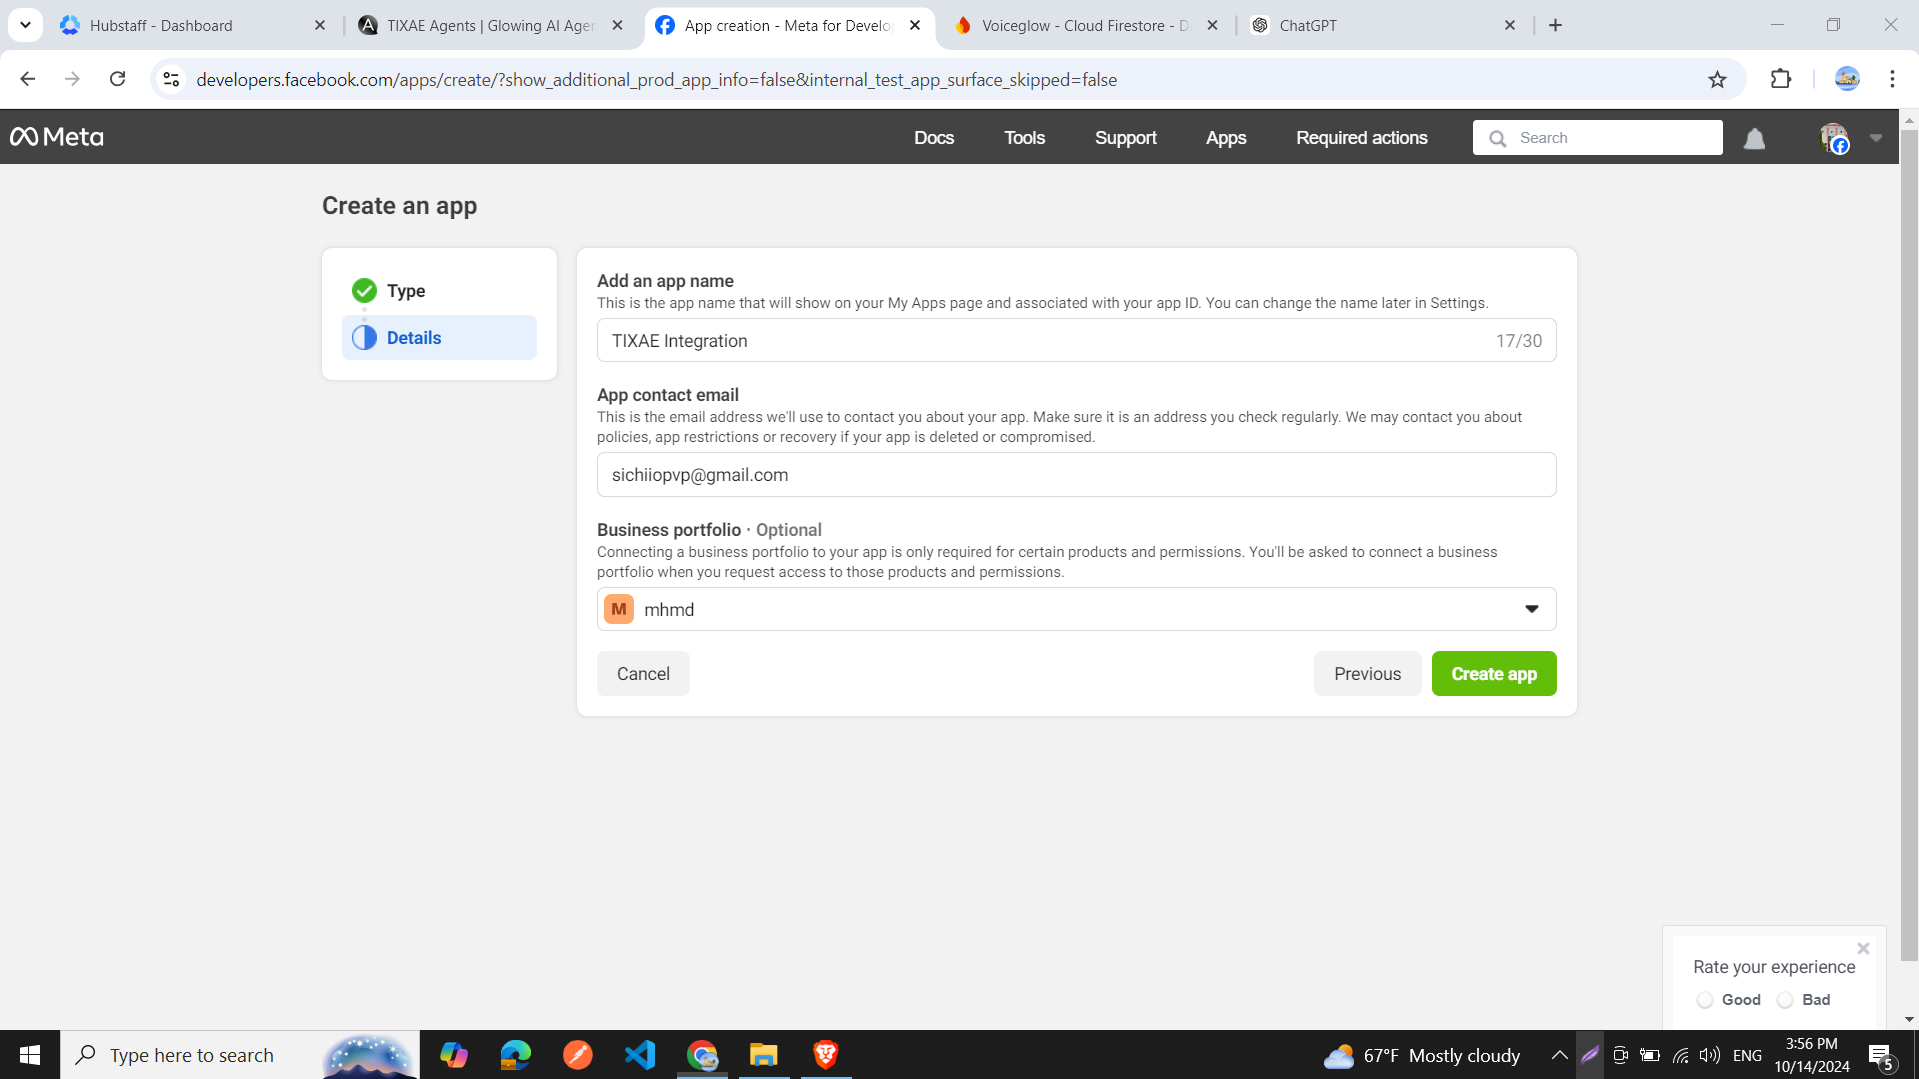
- Provide a name for your app and an app contact email.
- Choose the business portfolio.
- Click the green “Create App” button.
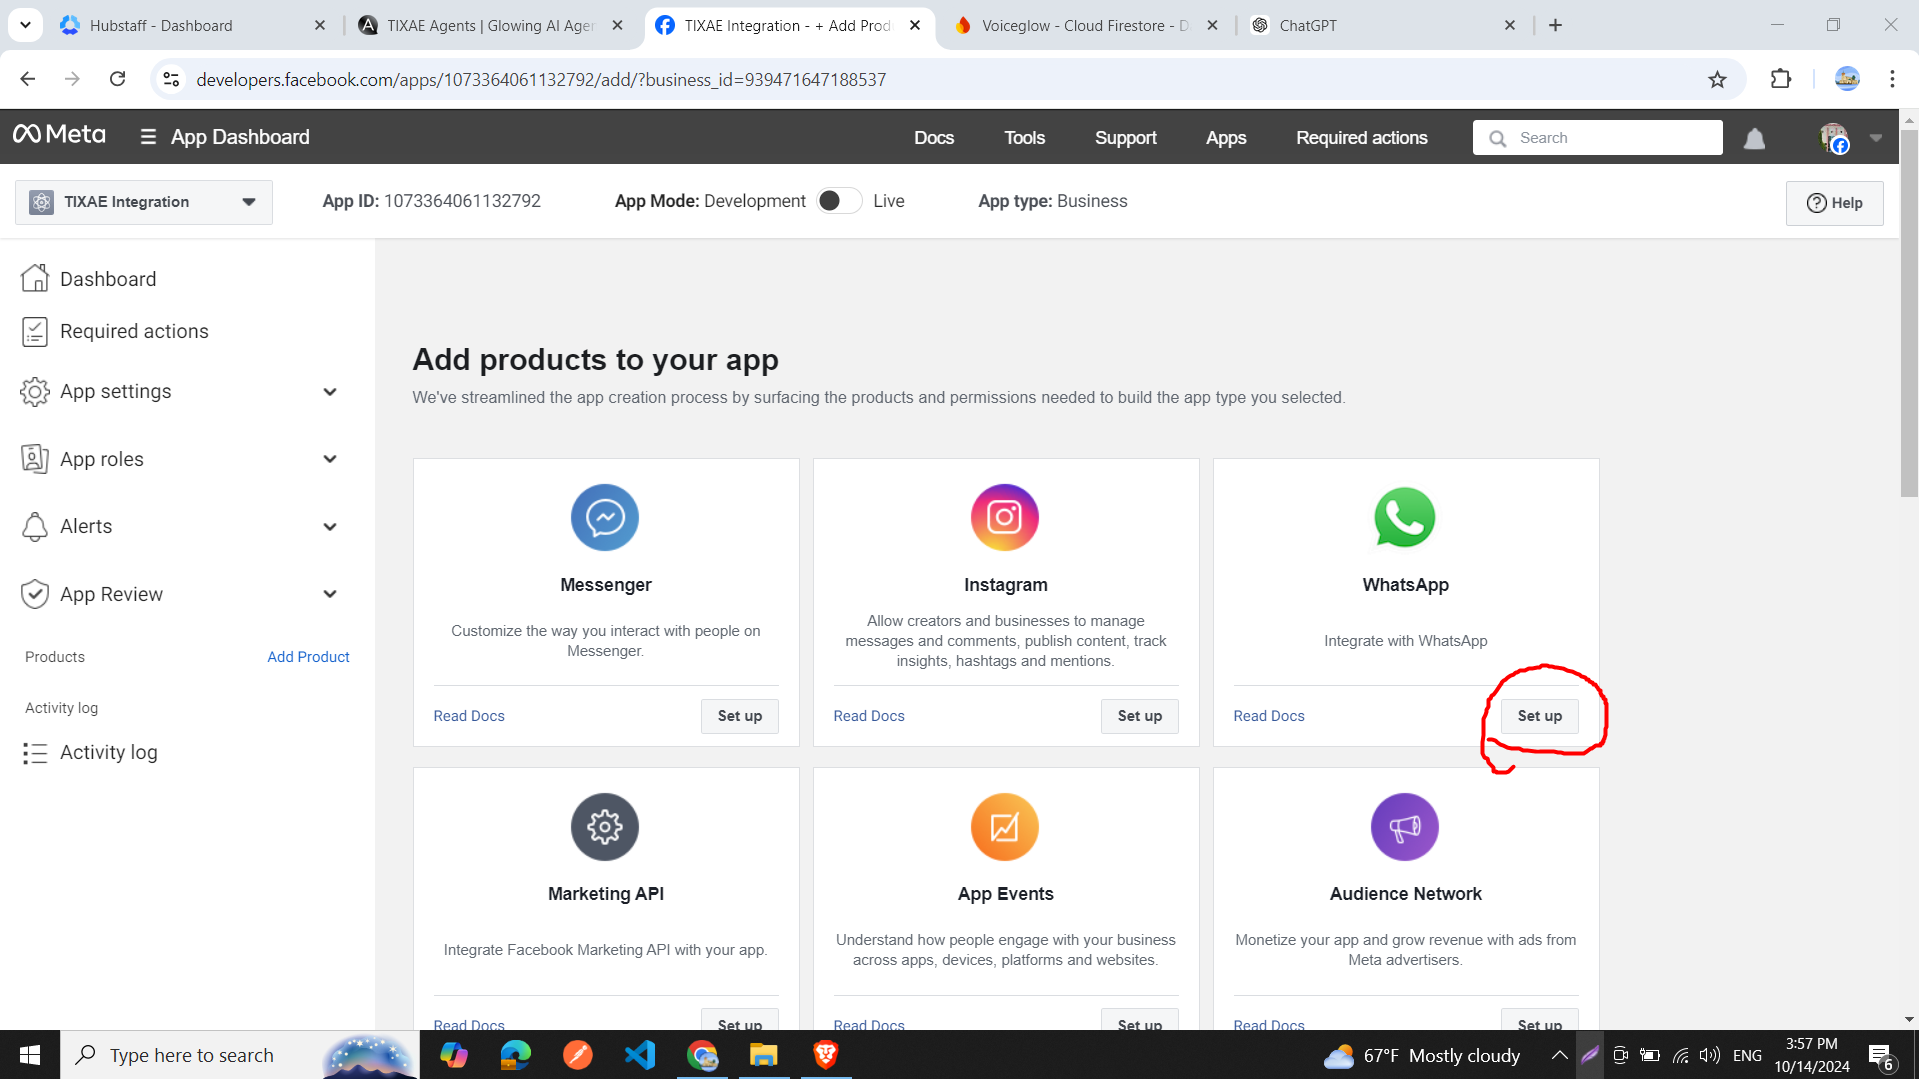
Step 2: Set Up WhatsApp in Your App
- On the “Add Products to Your App” page, locate the WhatsApp icon and click “Set Up”.
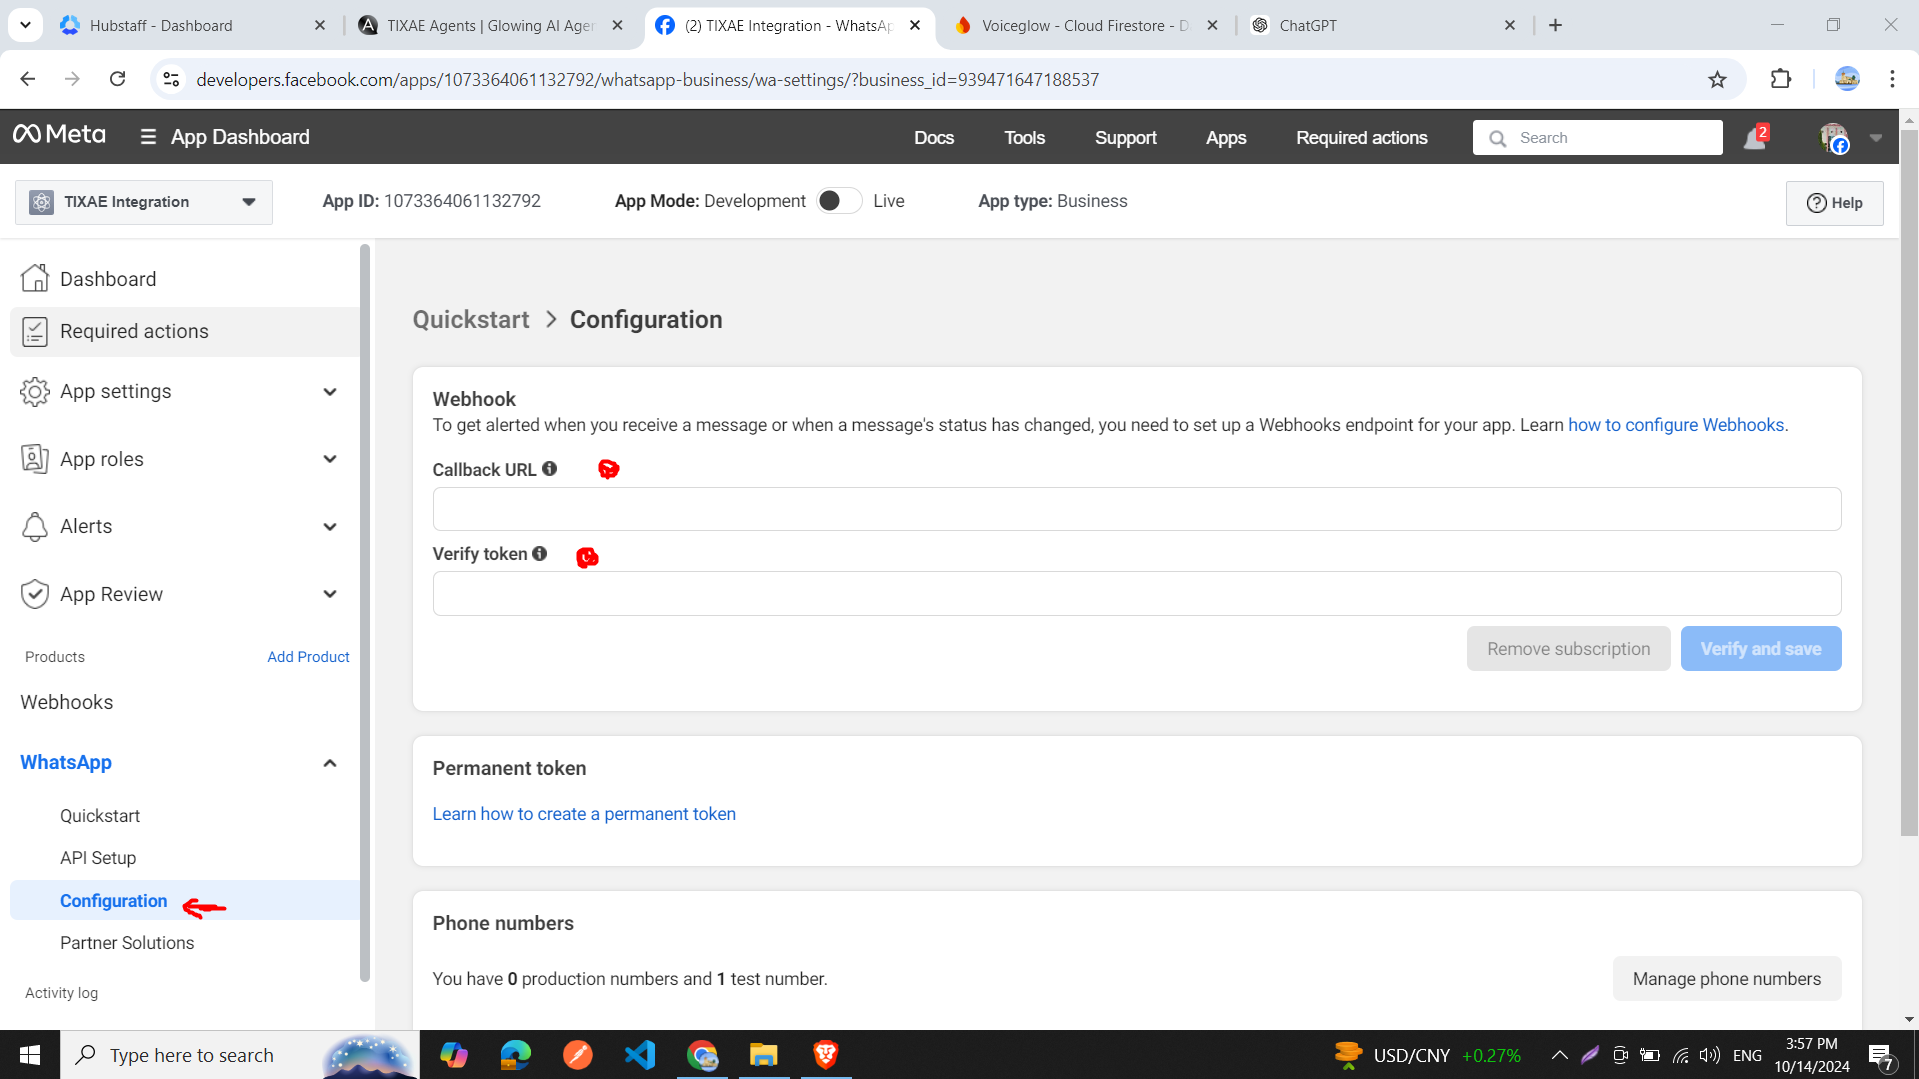
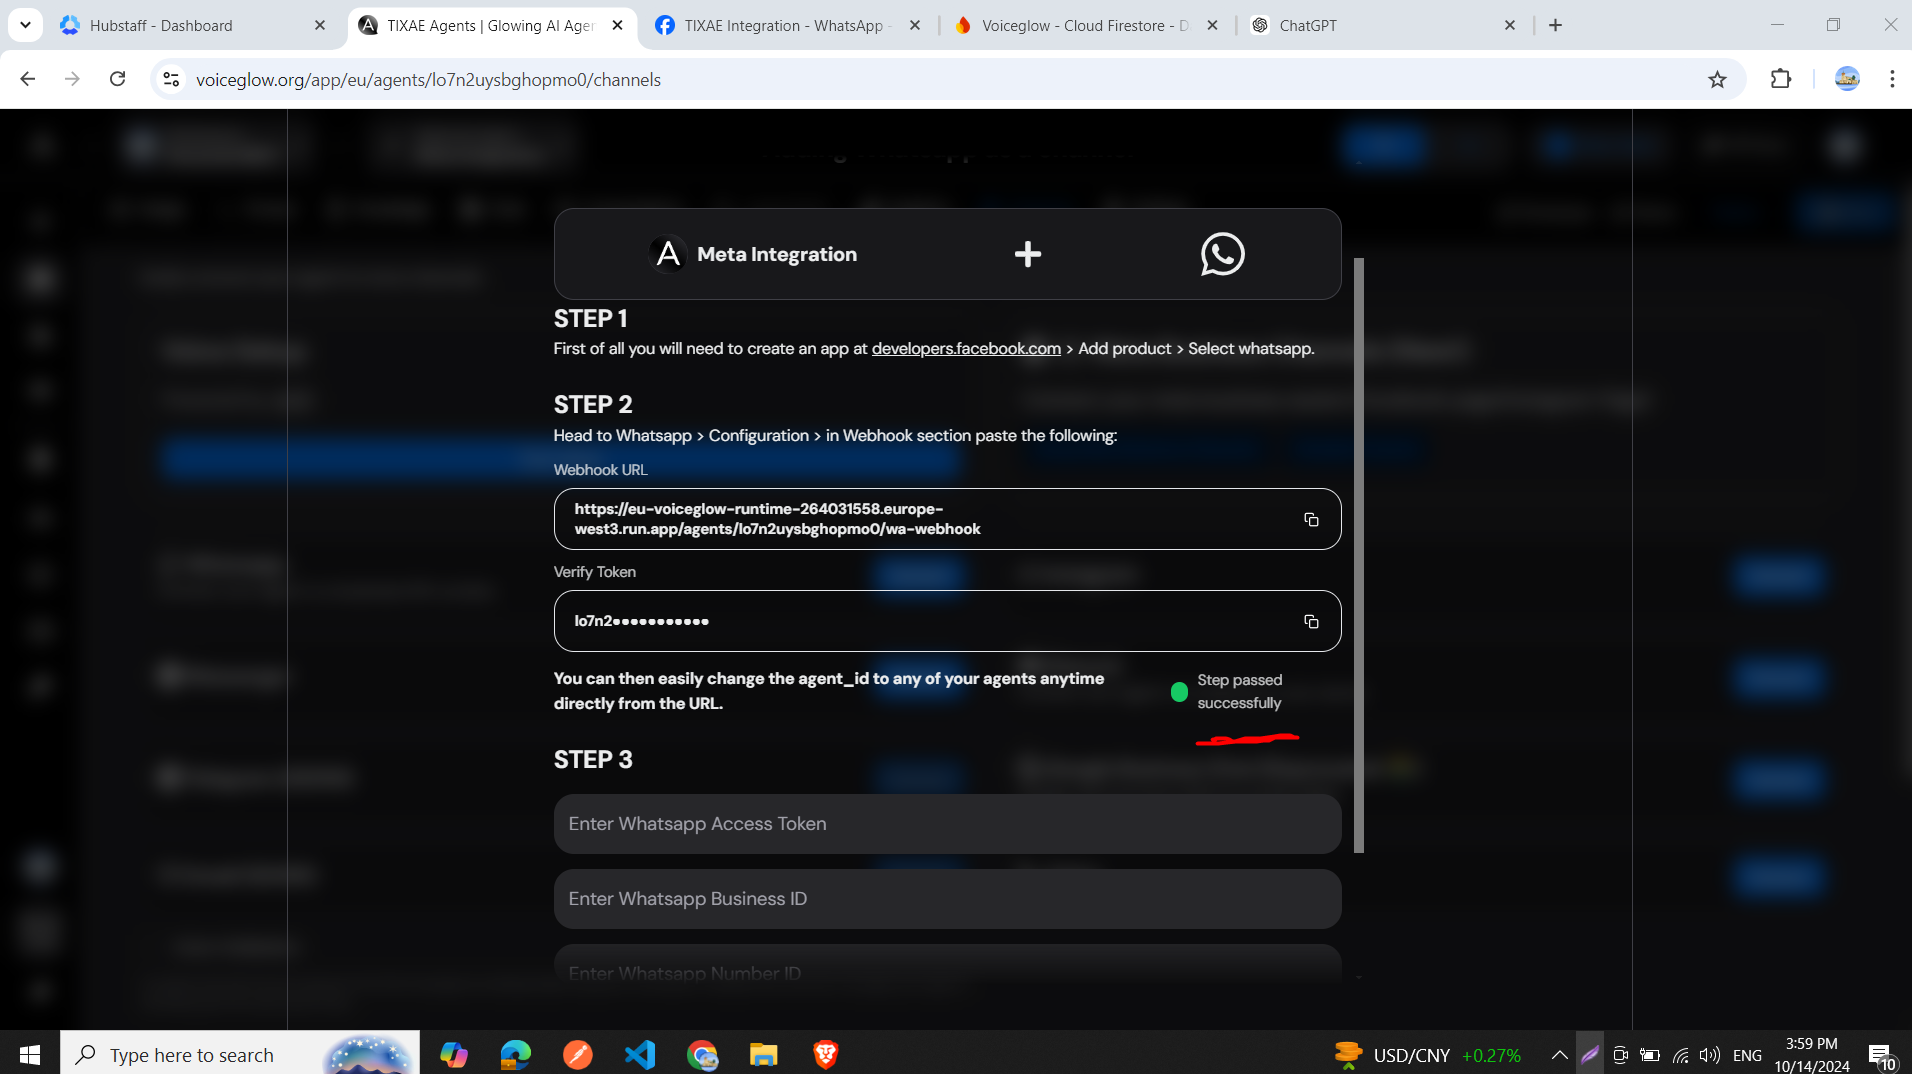
- In the sidebar, click on the “Configuration” tab.
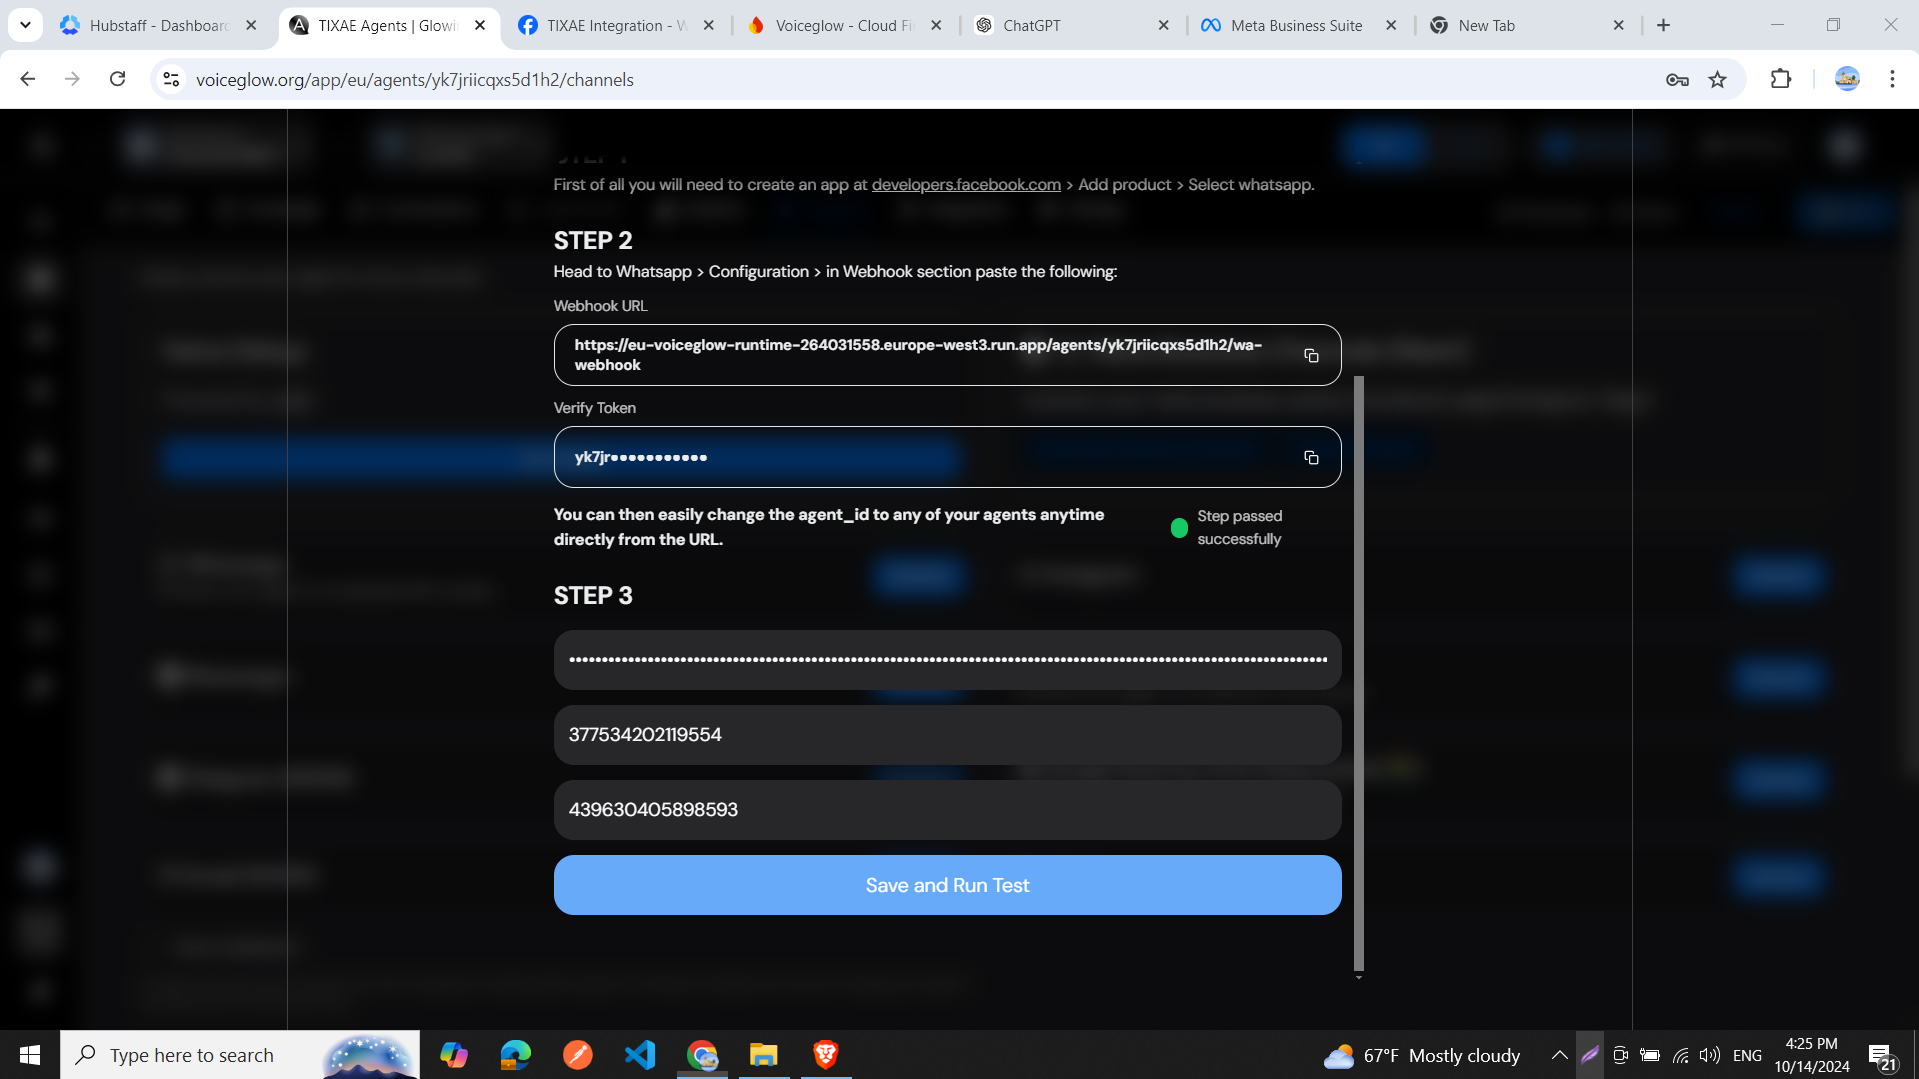
- In the Configuration window:
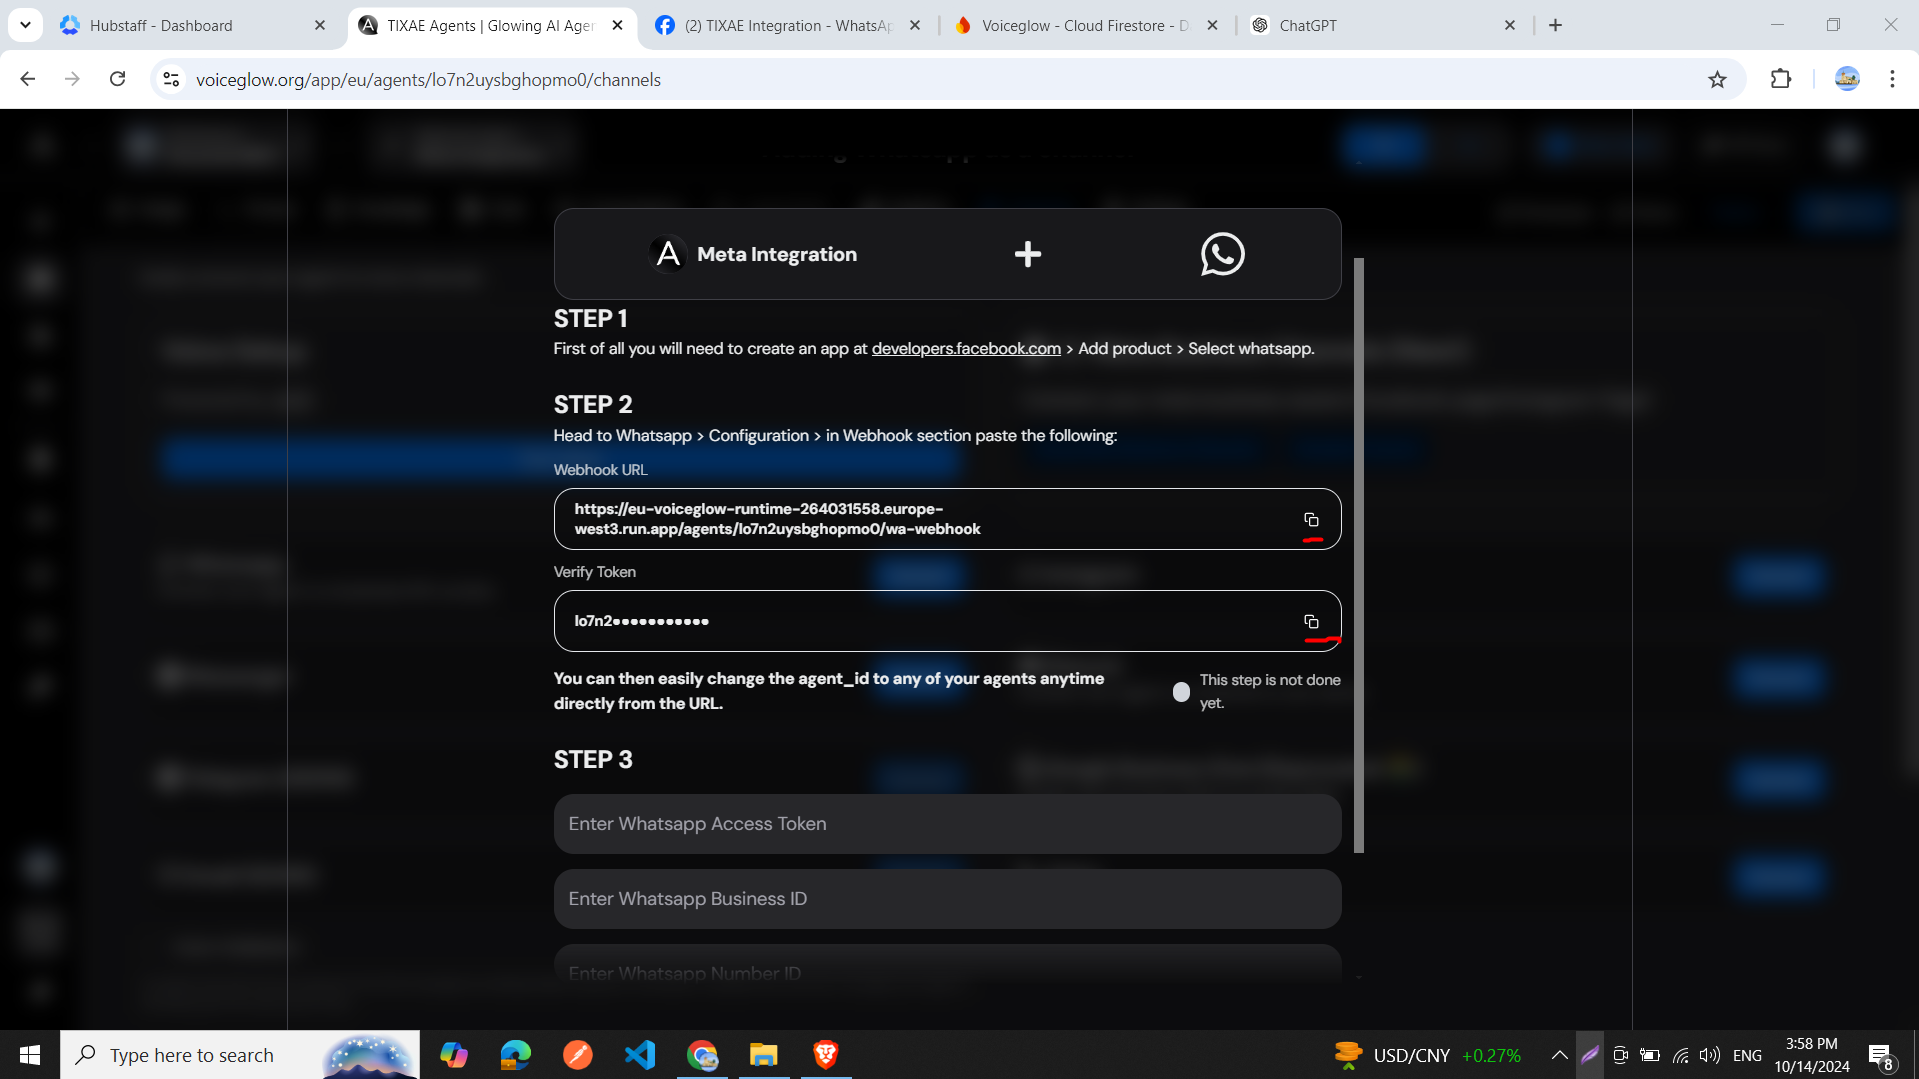
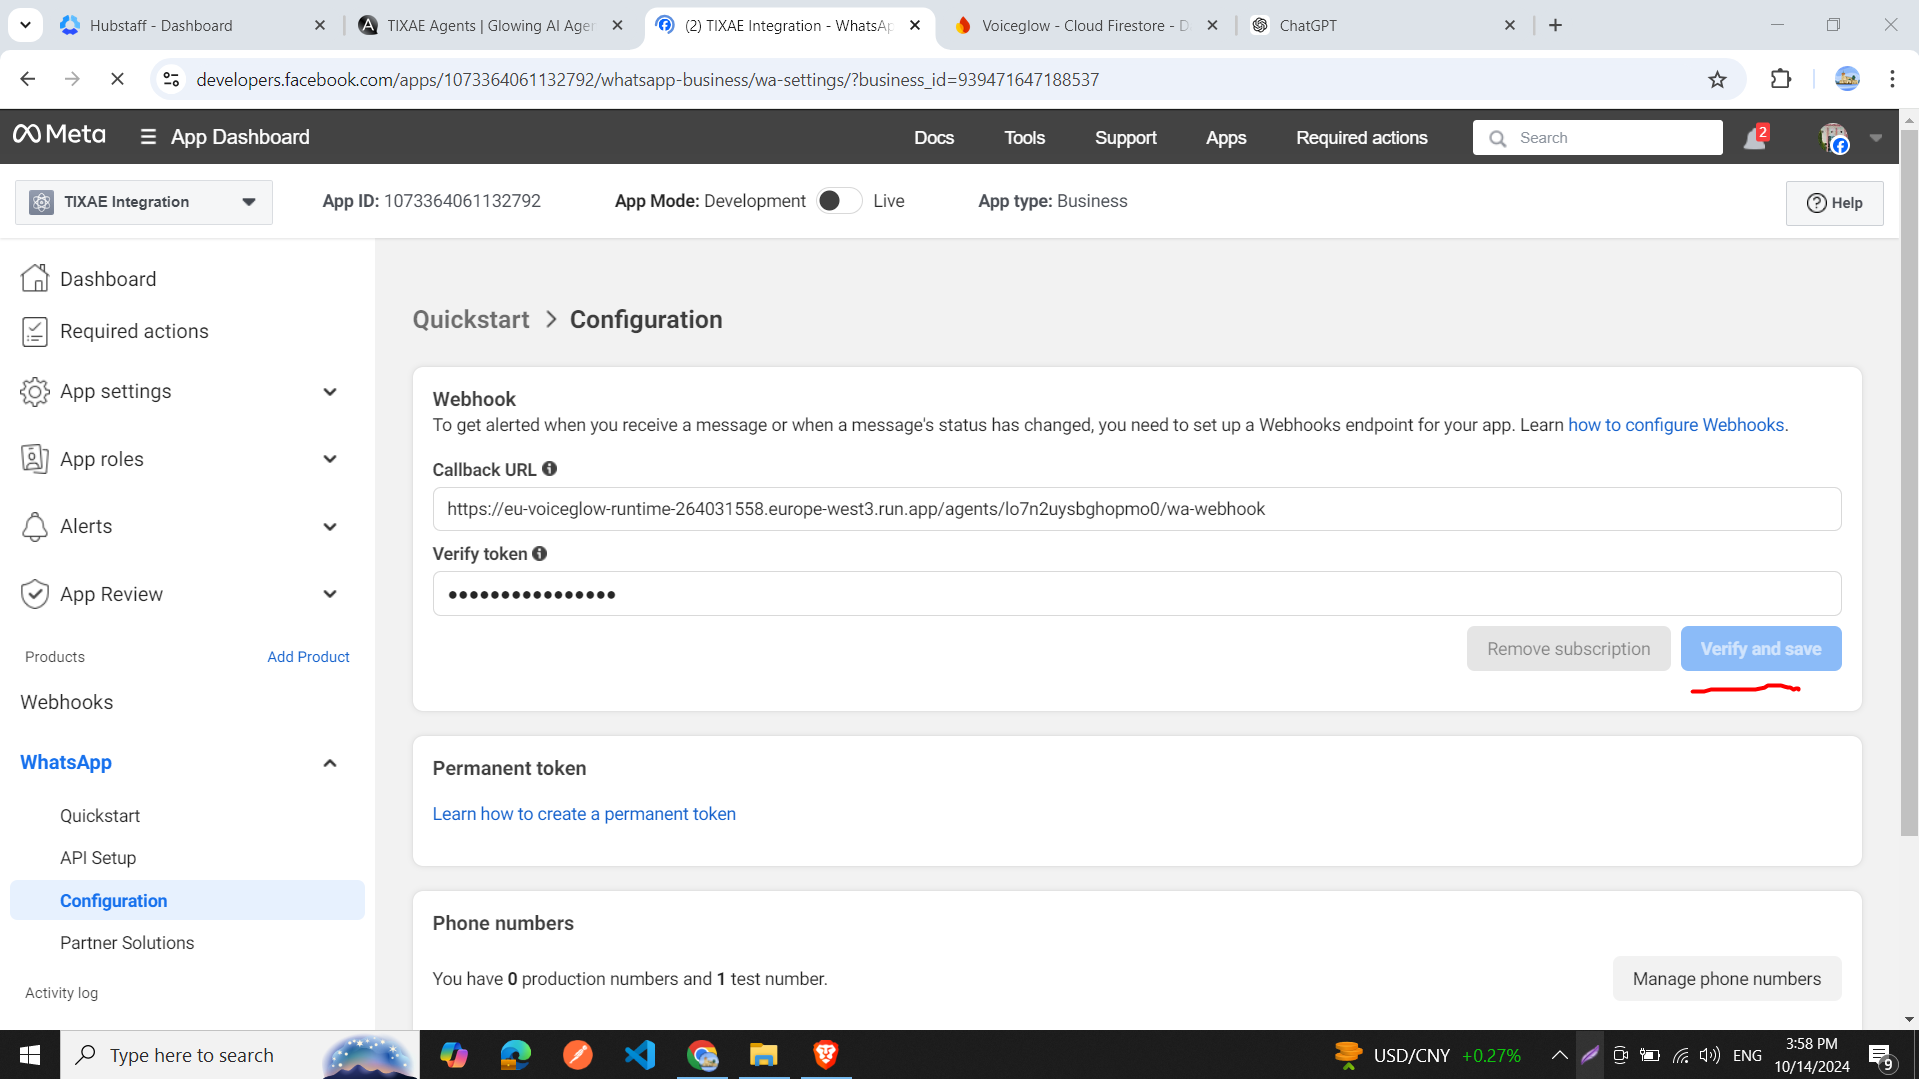
- Paste the callback URL and verify token from your Convocore agent (found in Channels > WhatsApp).
- Click “Verify and Save”.
- You should see a green success message in the Convocore integration window.
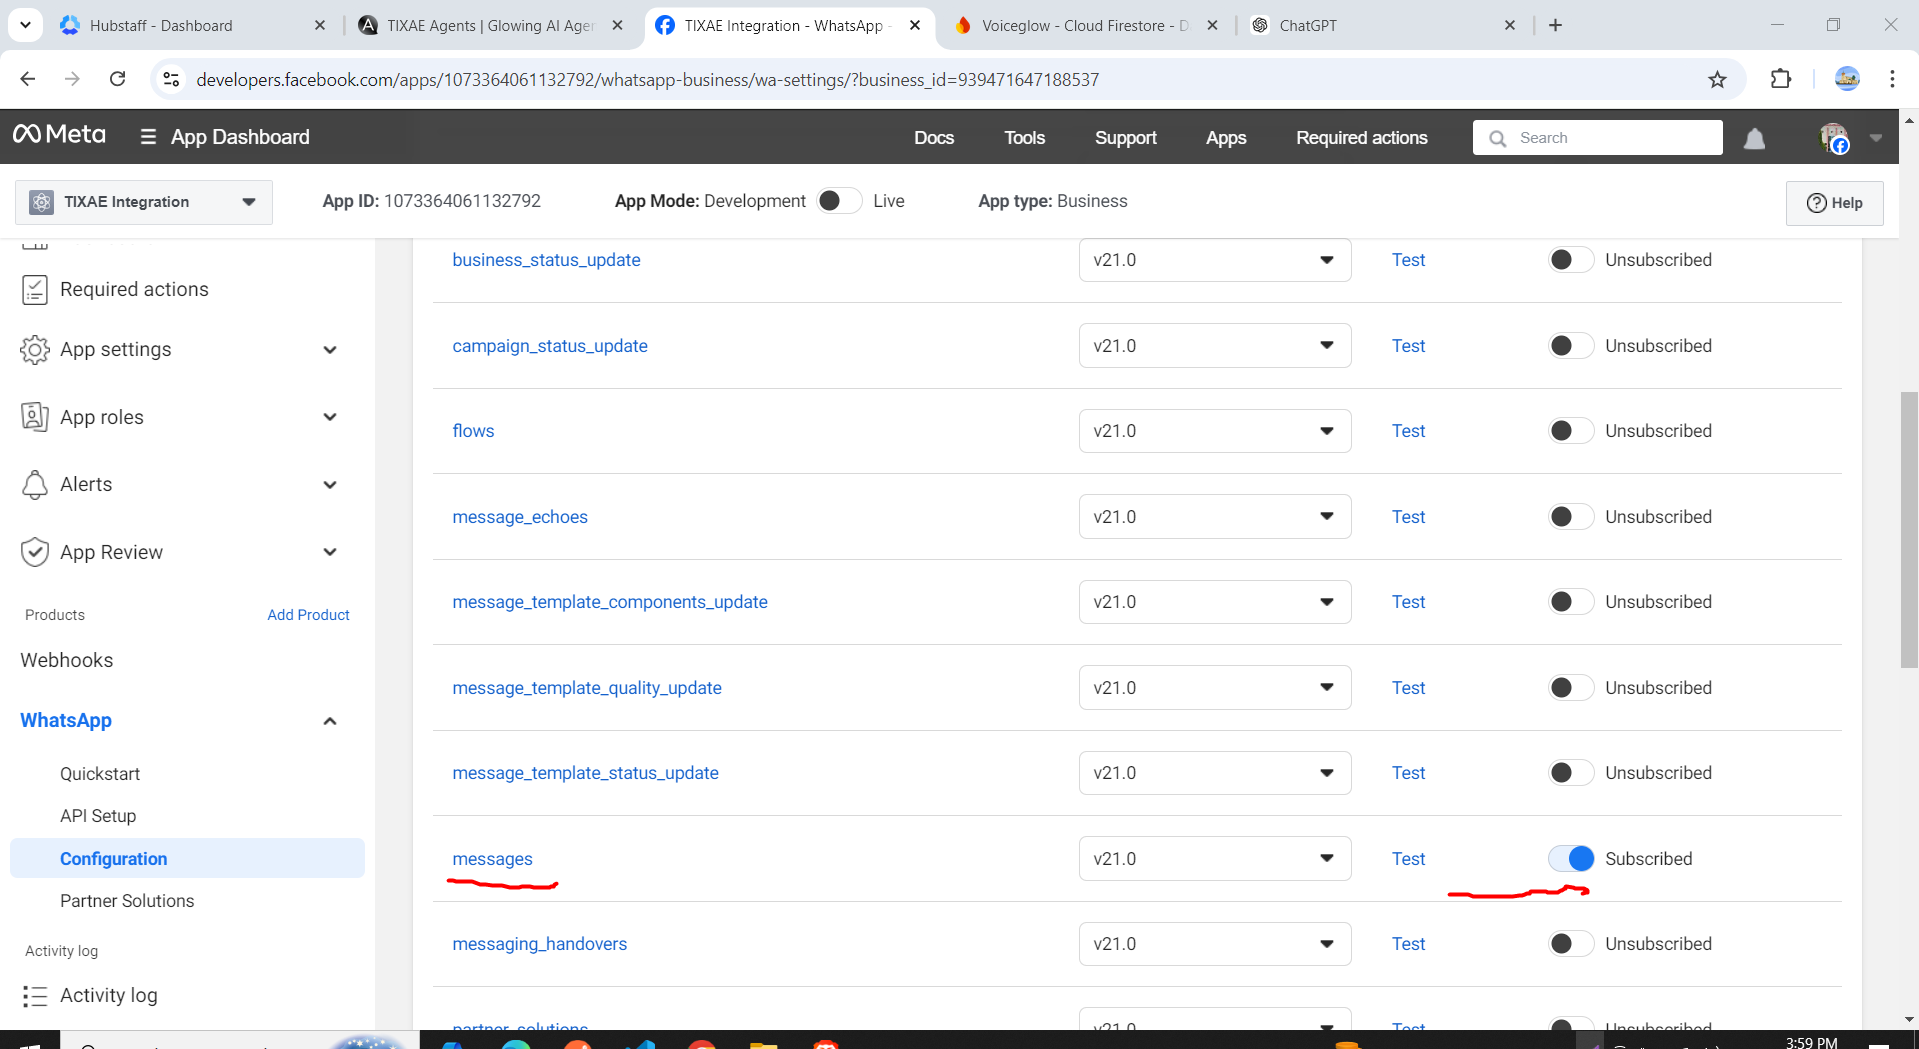
- Scroll down to “Webhook fields”.
- Locate the “messages” tab and subscribe to it.
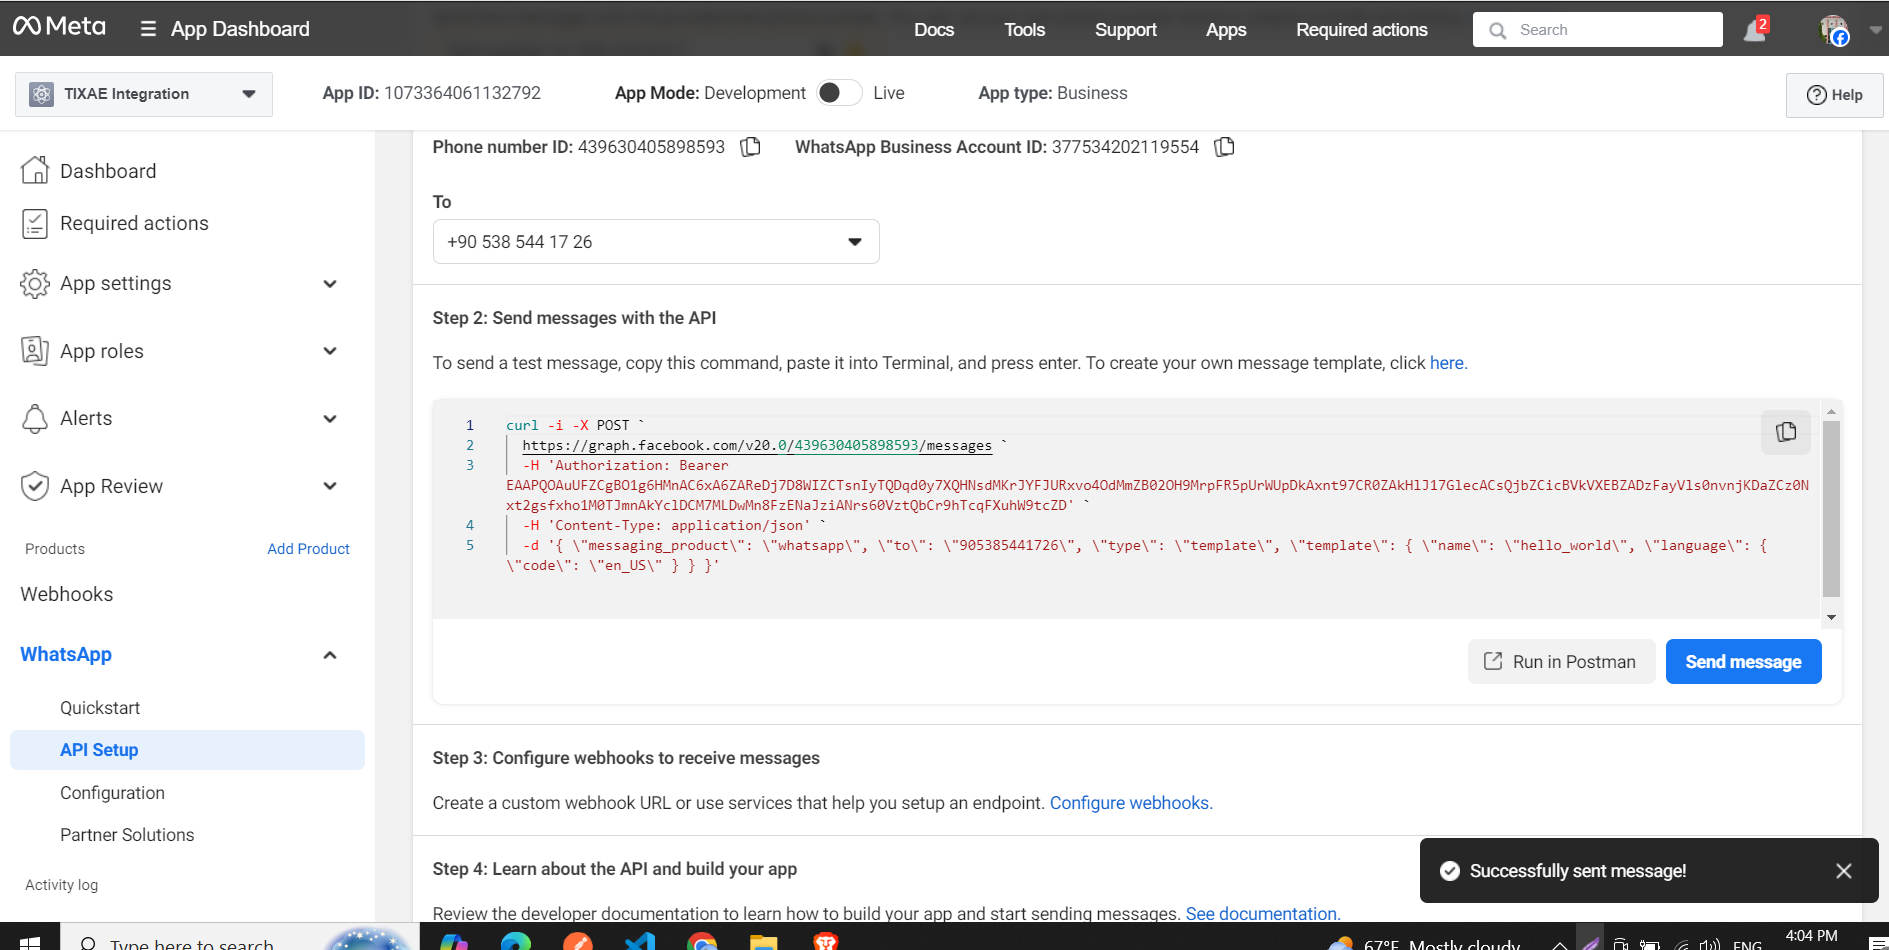
Step 3: API Setup
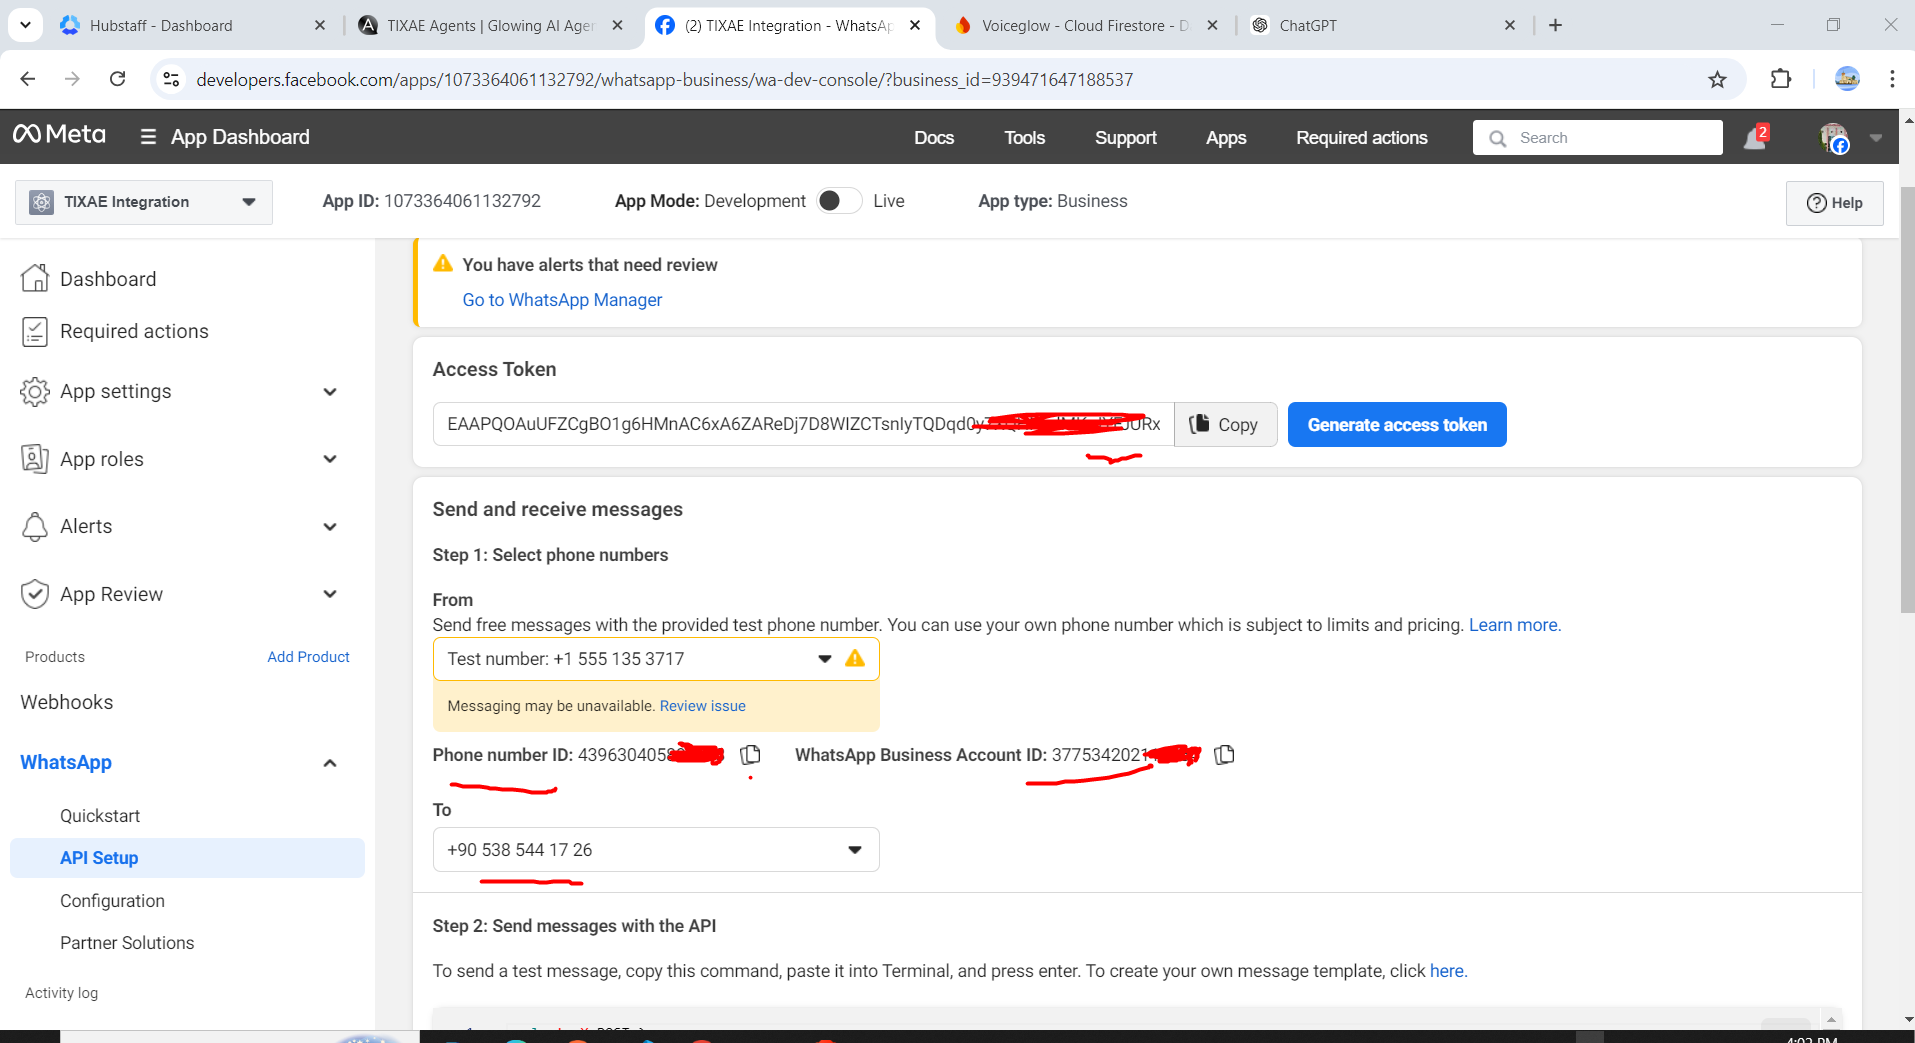
- Click on the “API Setup” tab in the sidebar.
- On the API Setup page, you’ll find:
- Your Phone Number ID
- WhatsApp Business Account ID
- A “Generate Token” button
- A list to choose a recipient phone number for testing
- Add your phone number and select it for testing.
- Click “Generate Token” to create a temporary access token.
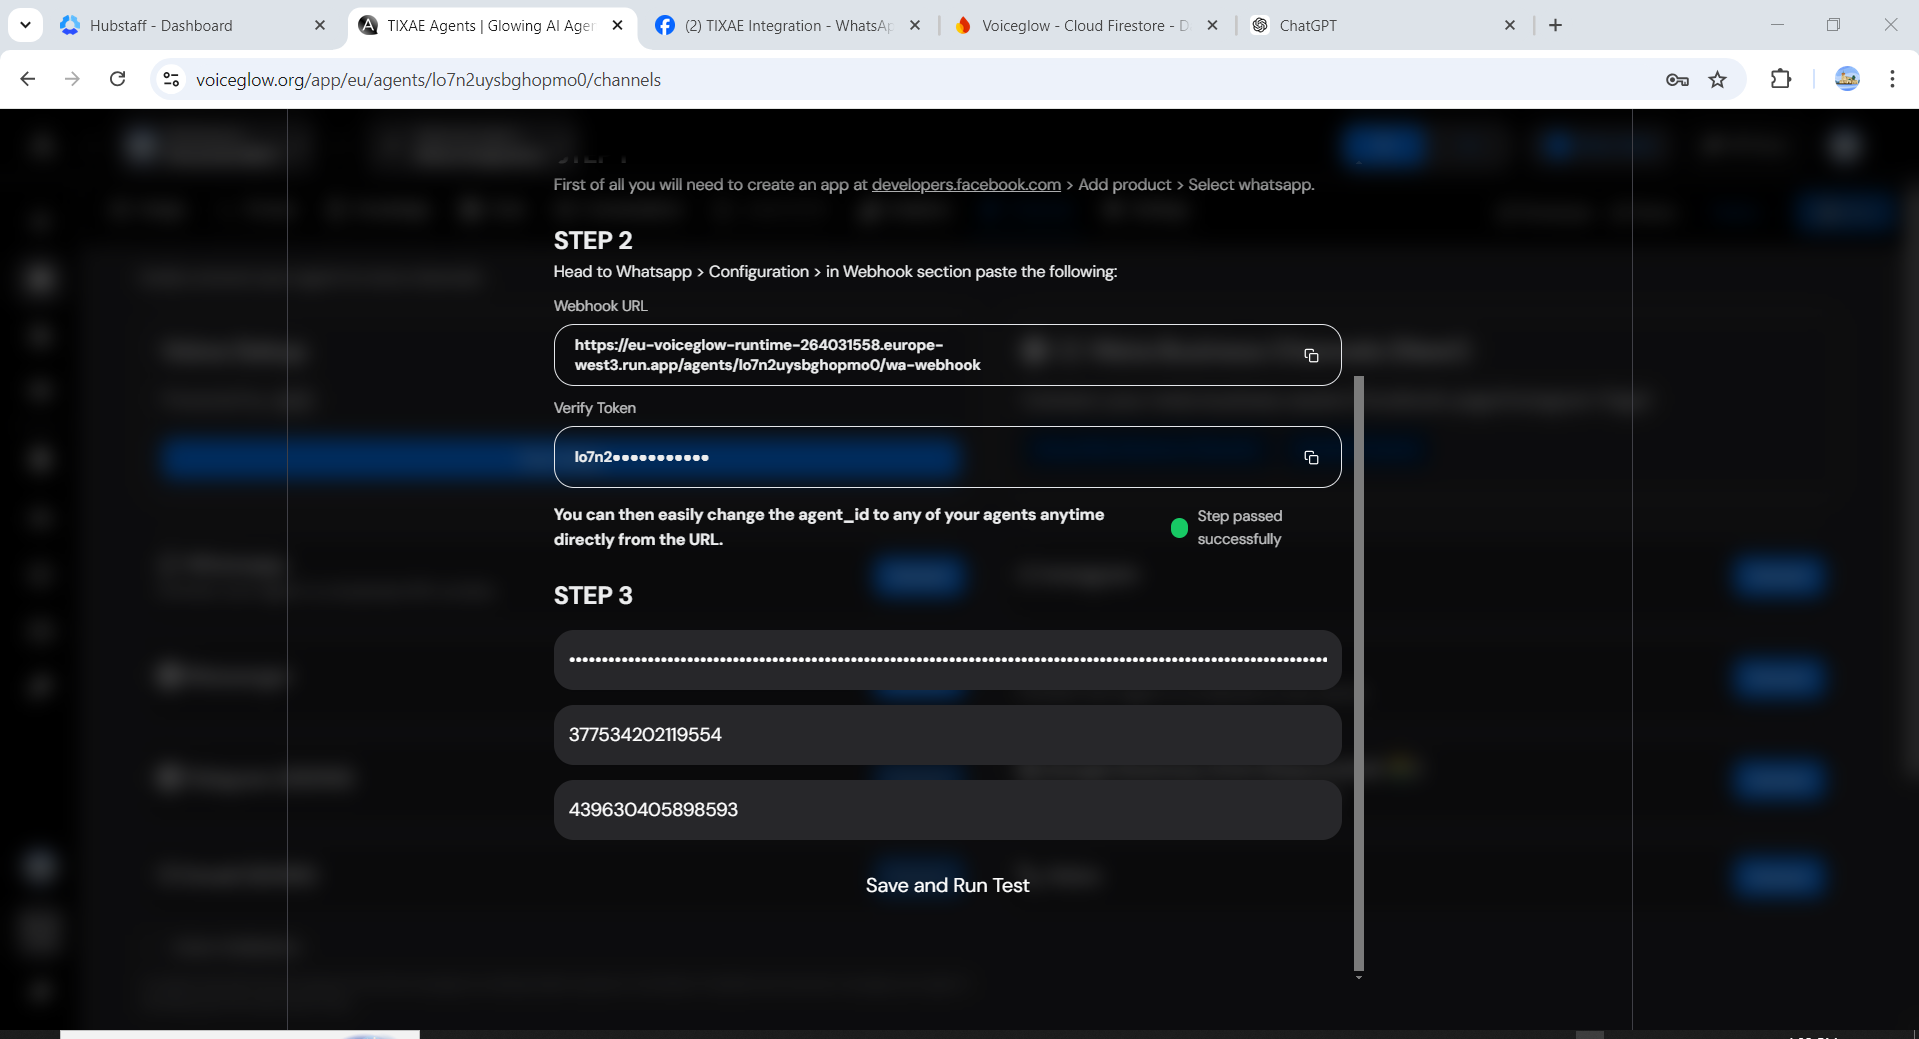
- Copy your token, phone ID, and business account ID.
- Paste these details into the Convocore integration window.
- (Optional) Click the “Send Message” button on the App dashboard to send a test message to your recipient number.

Step 4: Generate a Permanent Access Token
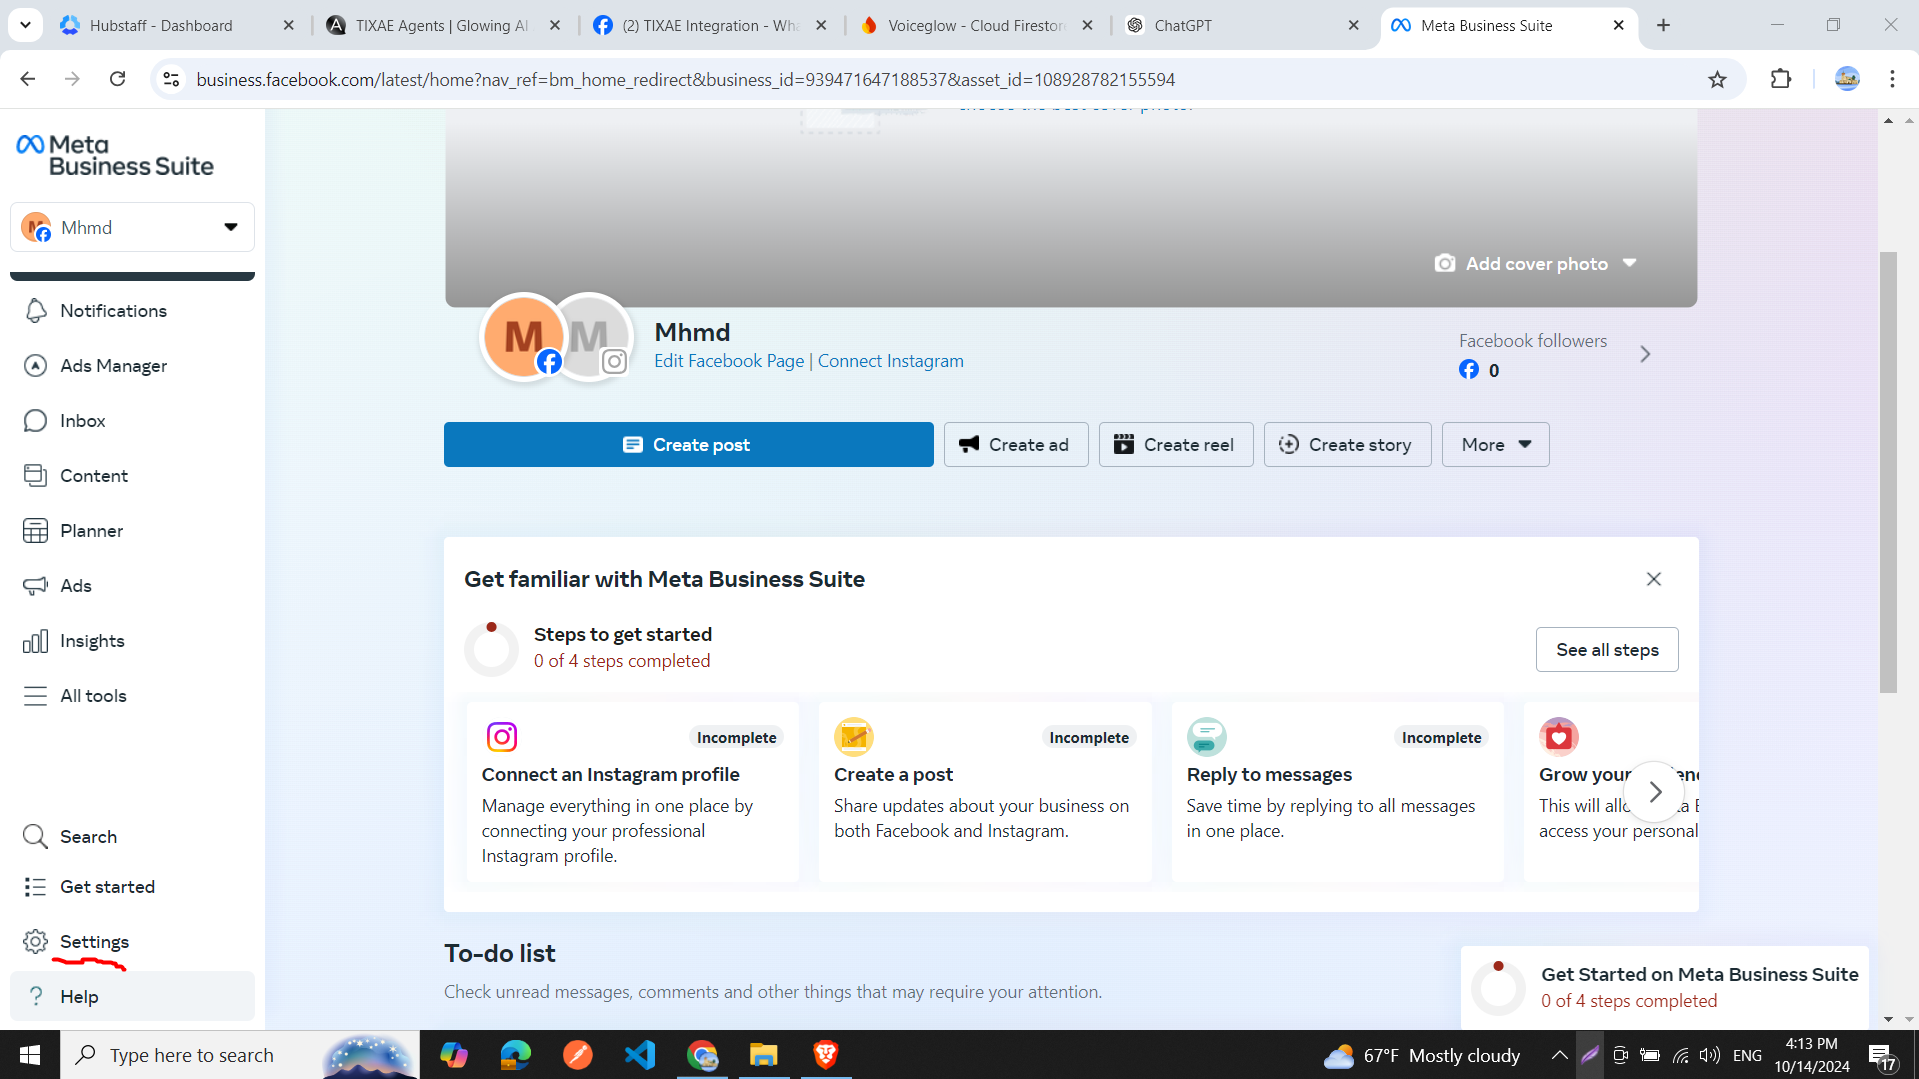
- Go to business.facebook.com.
- In the sidebar, click on “Settings” at the bottom.
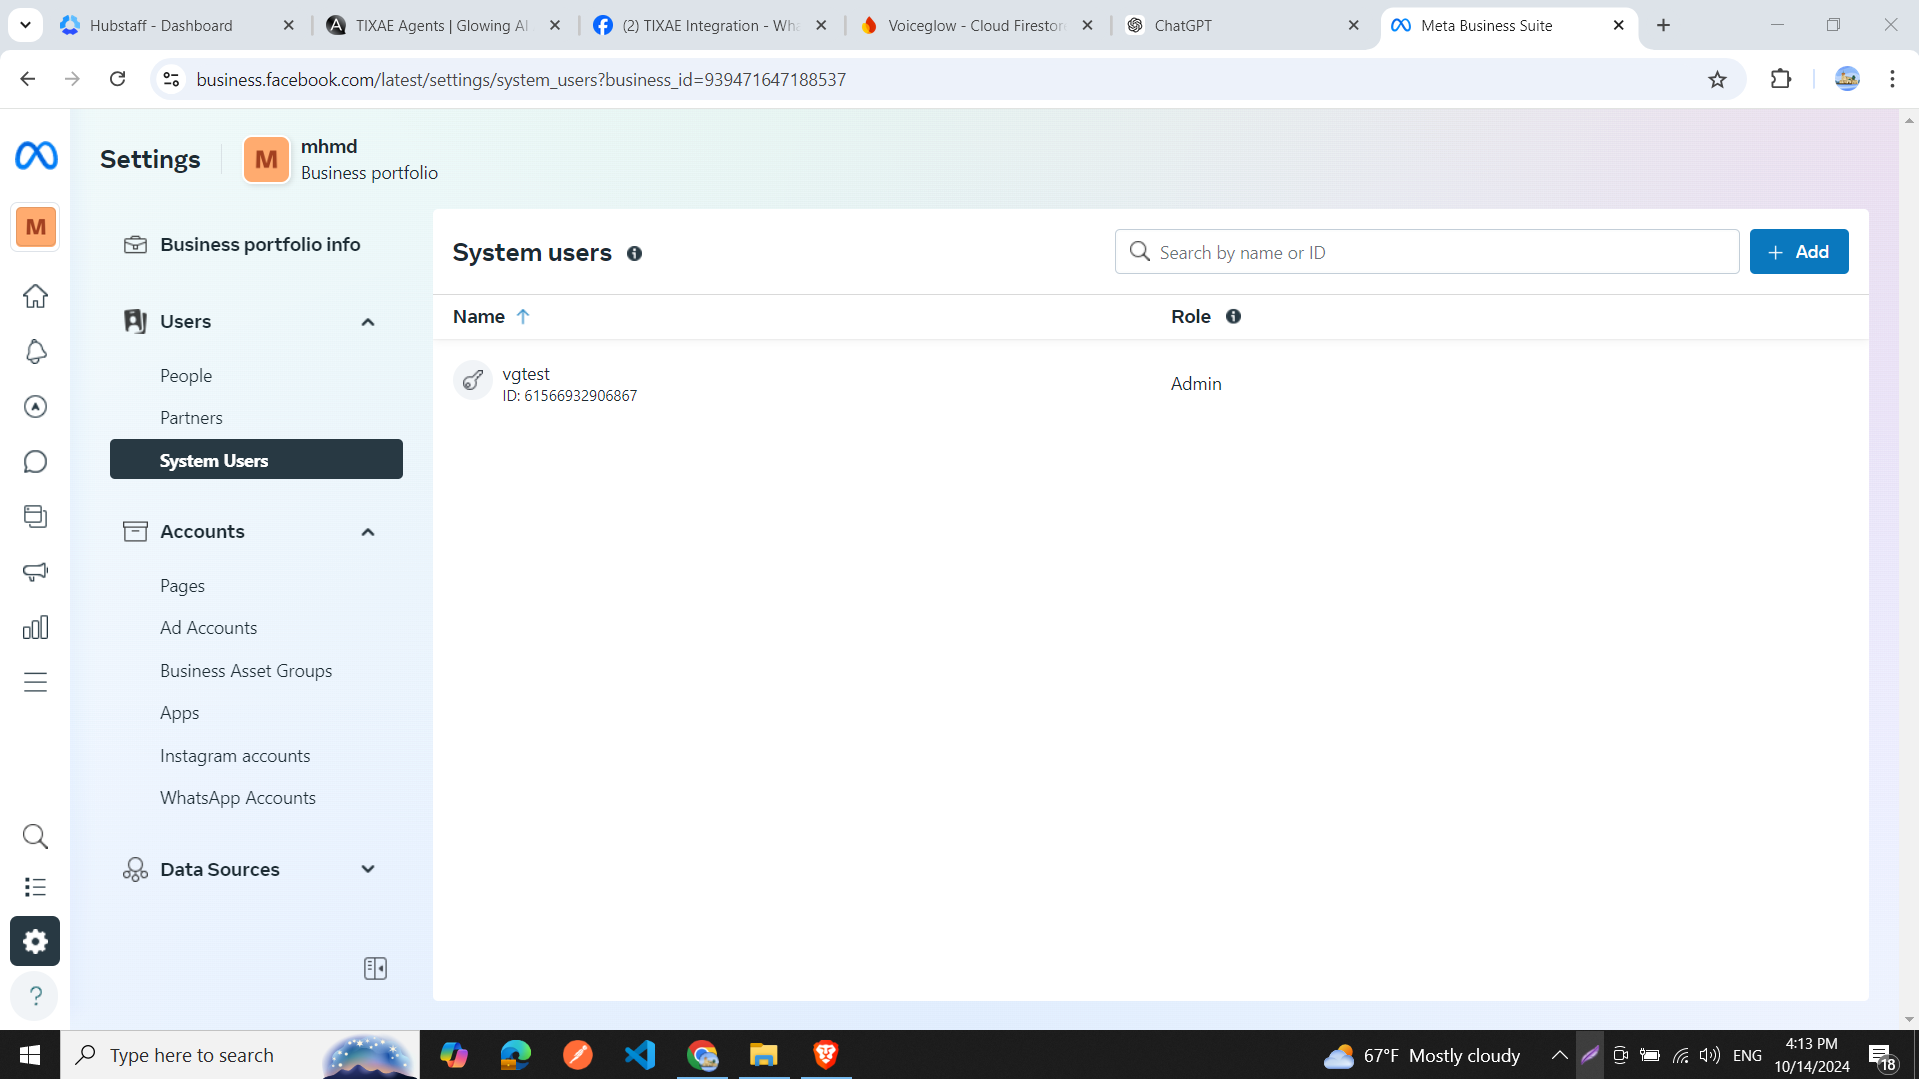
- Go to the “Users” tab and click on “System Users”.
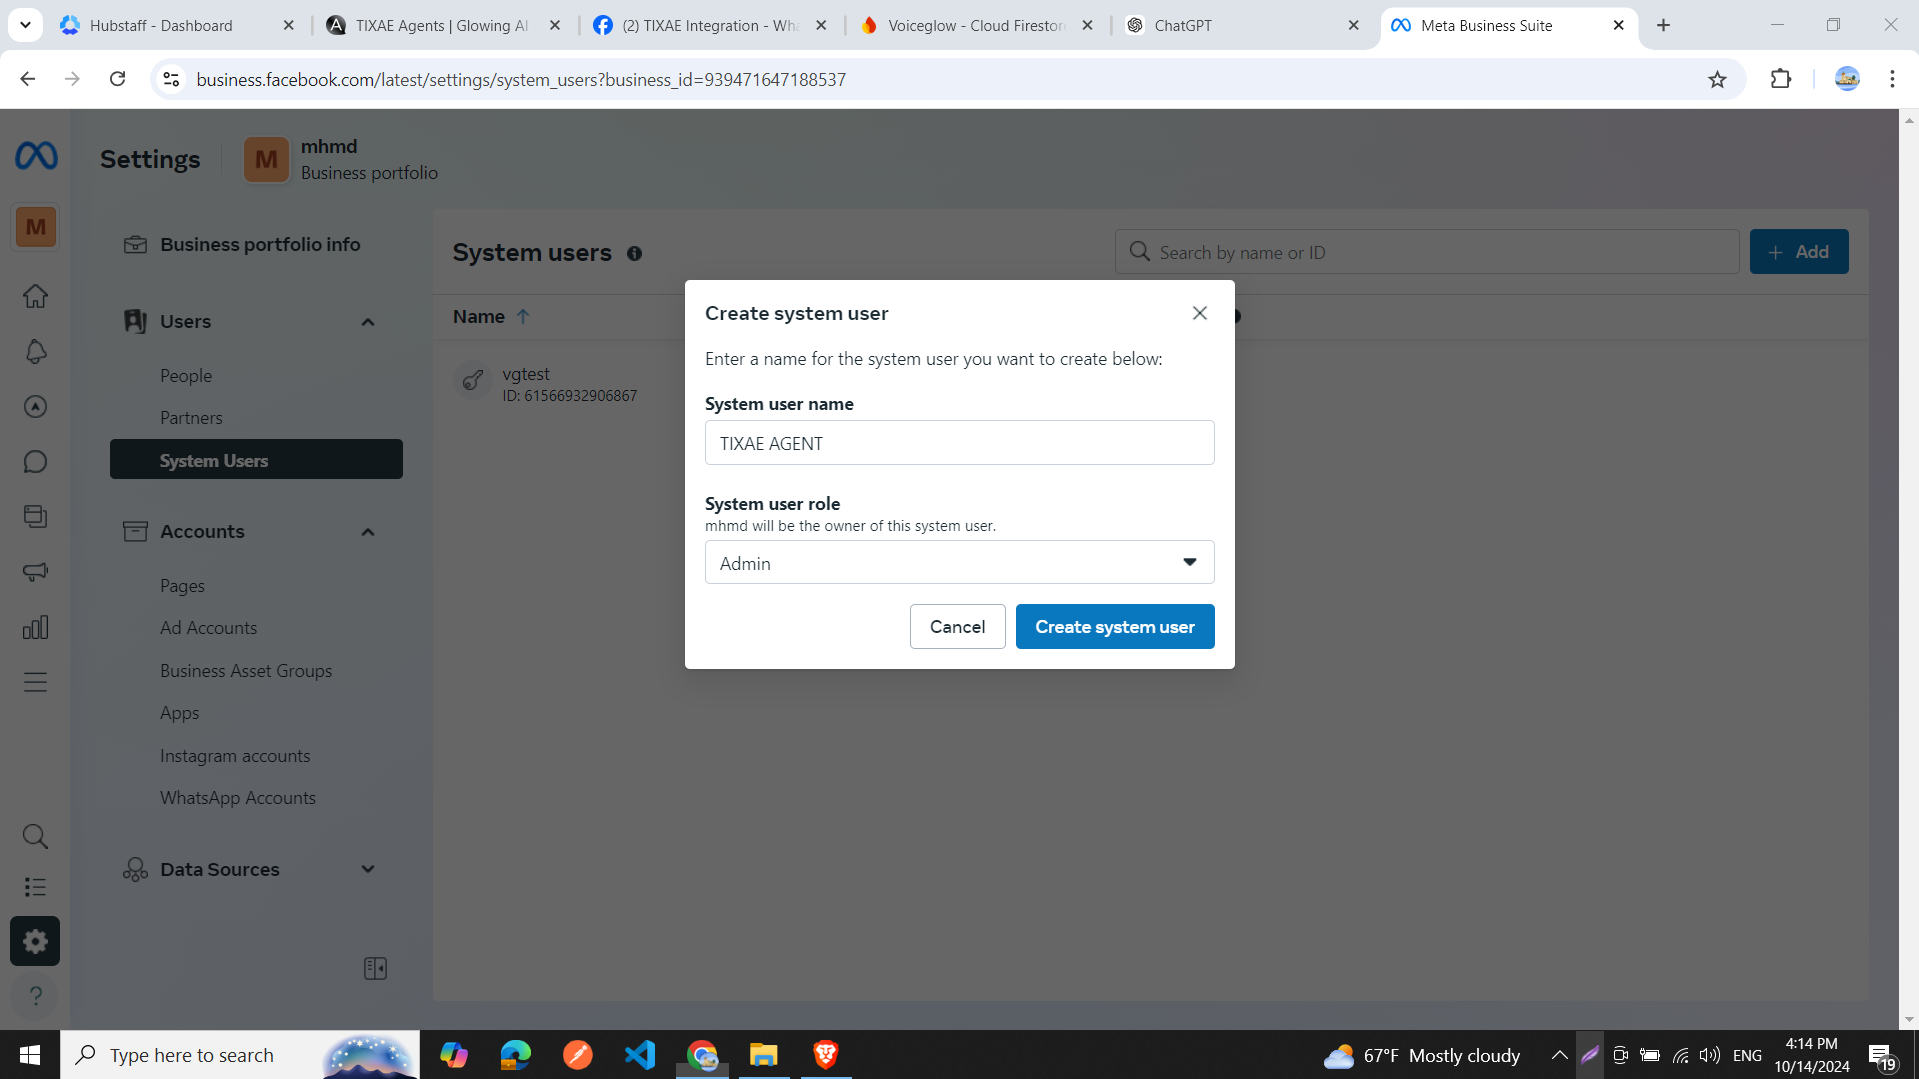
- Click the “Add” button to create a new system user:
- Enter a system user name.
- Choose the system user role (e.g., Admin).
- Click “Create System User”.
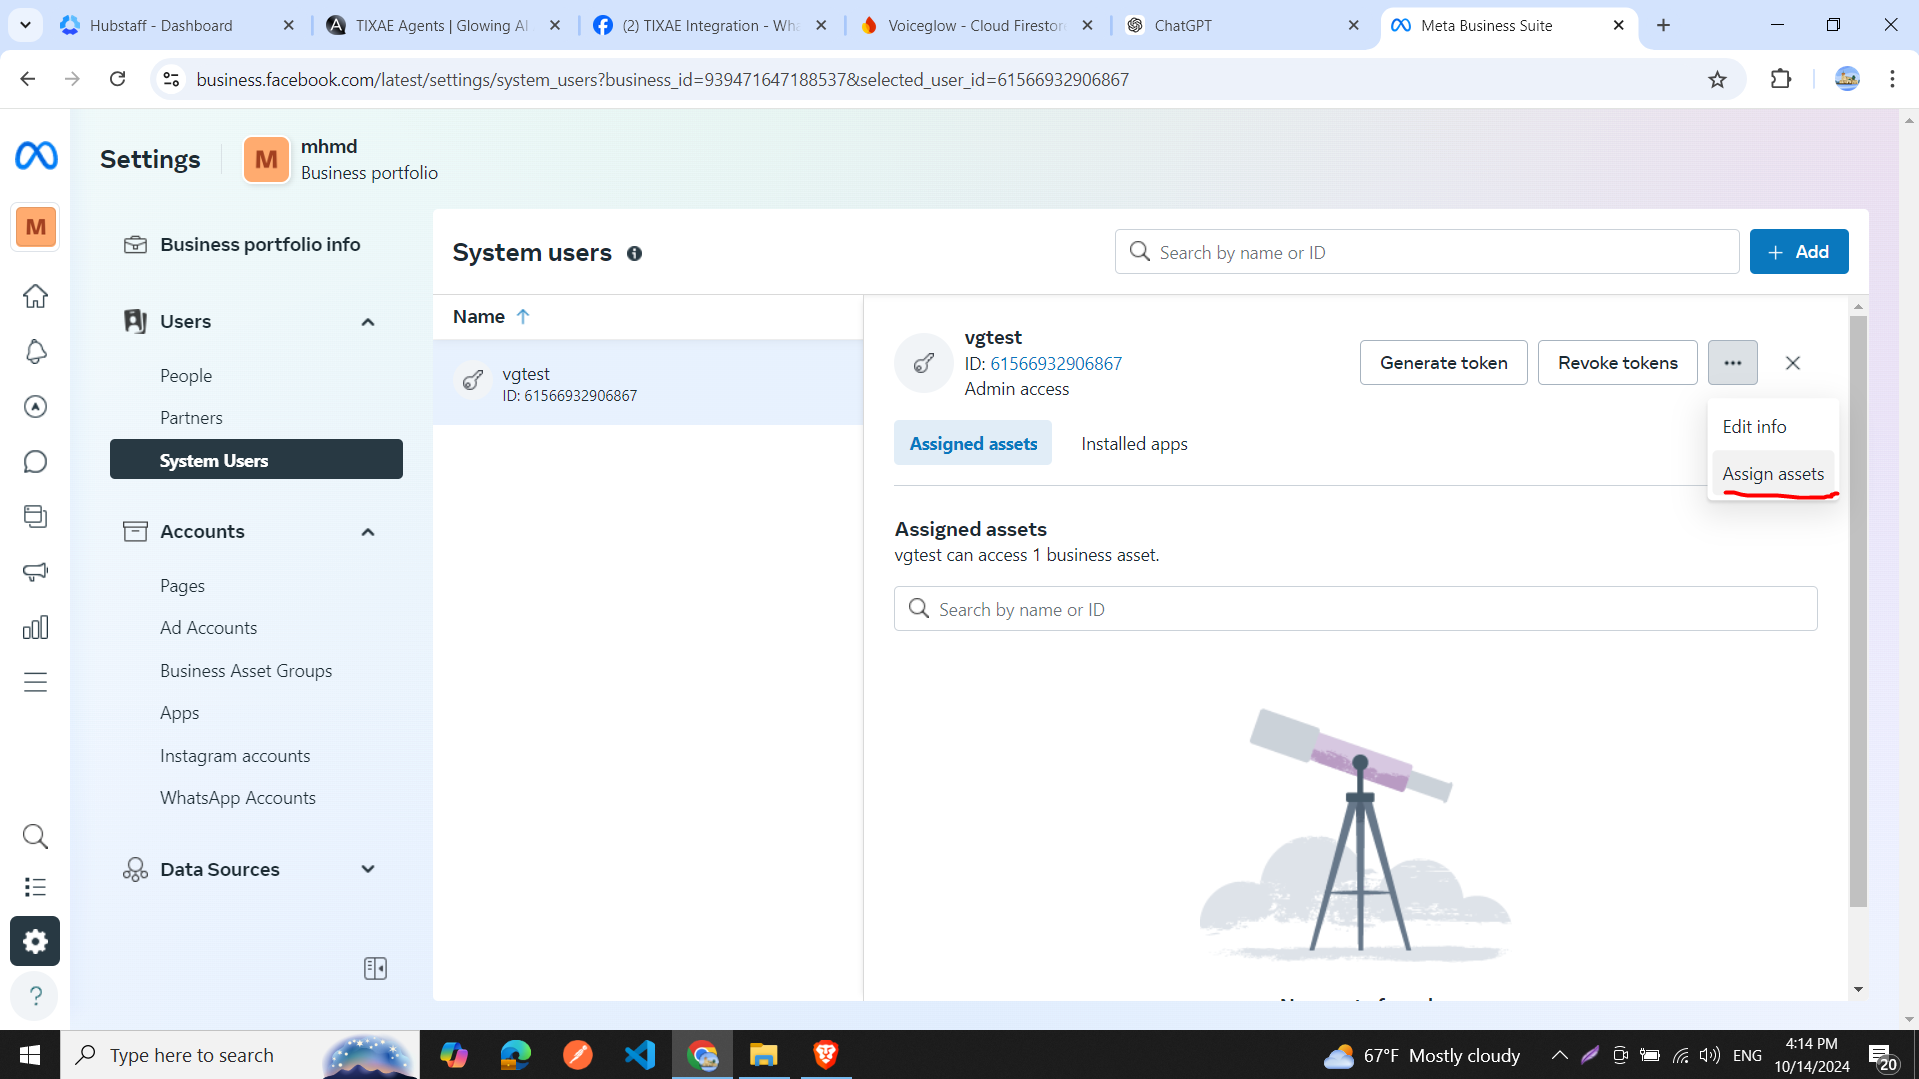
- For the newly created user:
- Click the three dots icon and select “Assign Assets”.
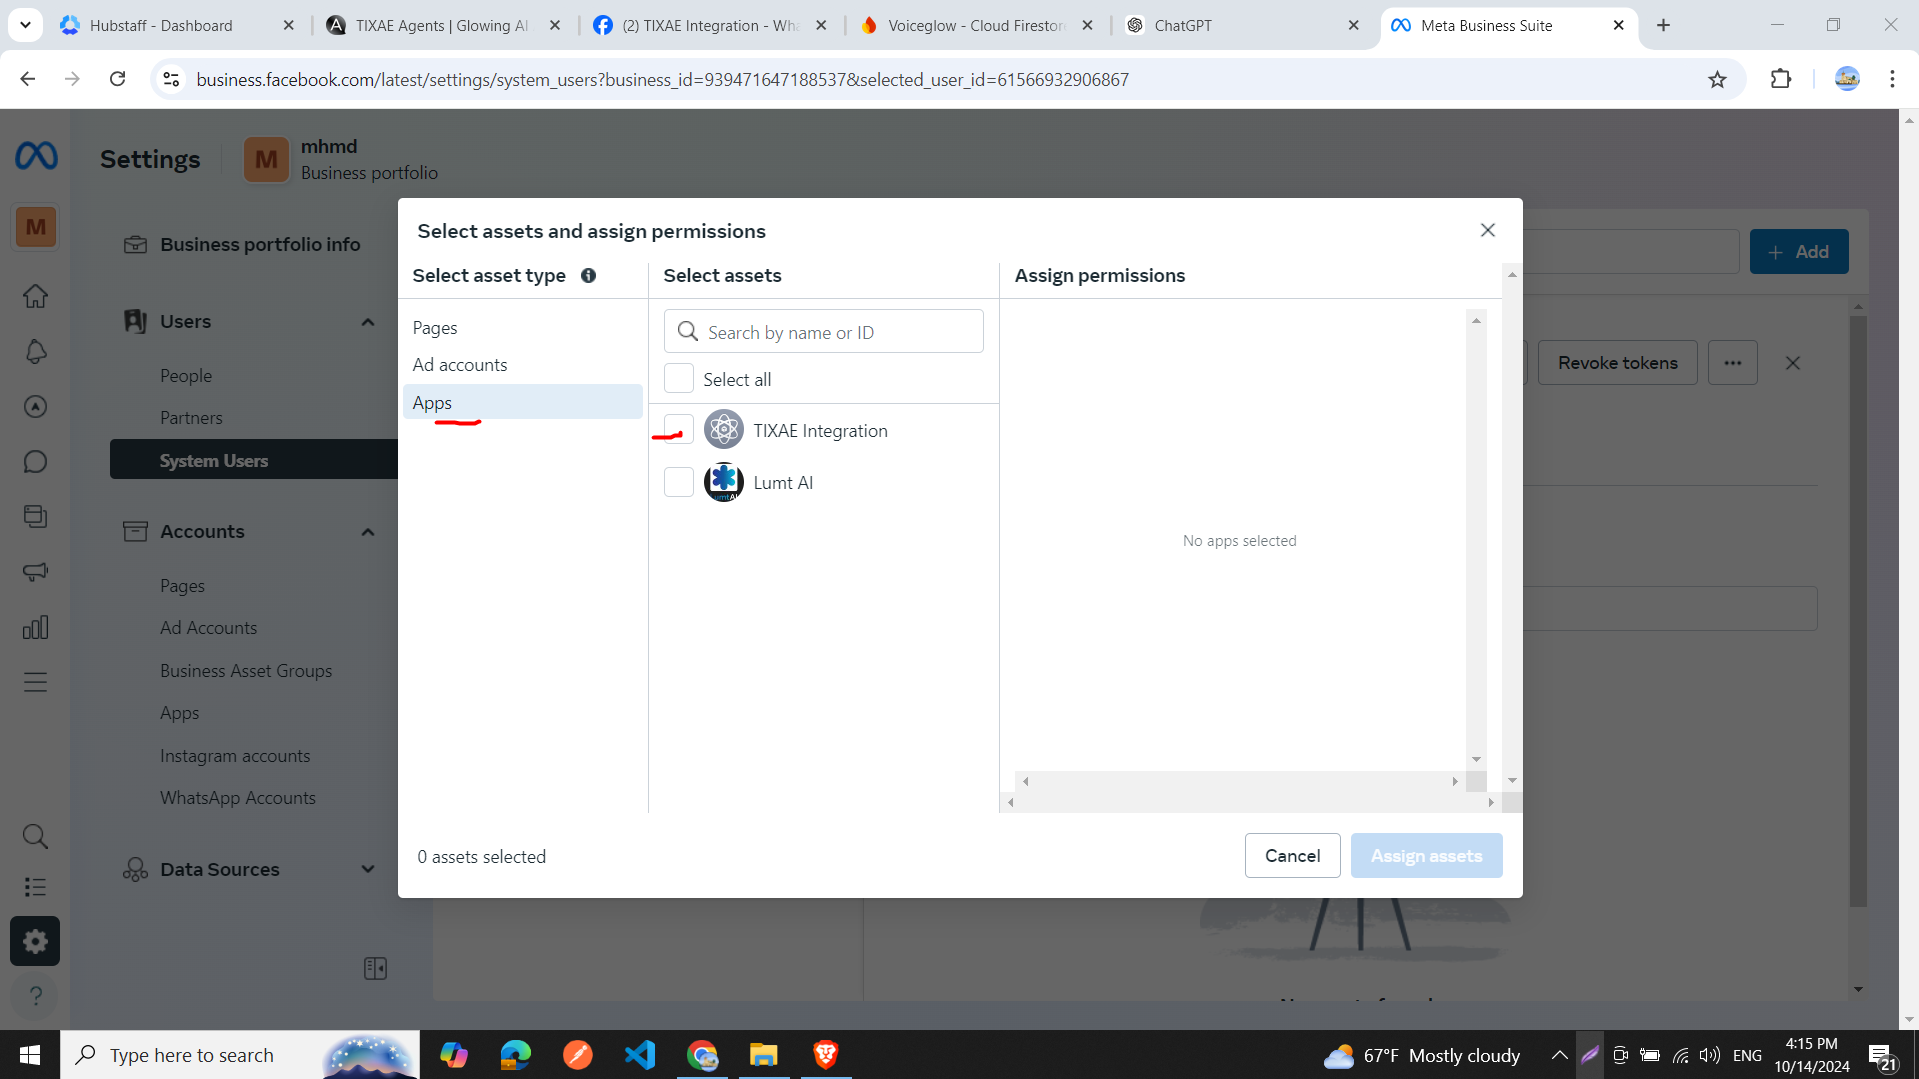
- In the dialog, select asset type as “Apps”.
- Choose the app you just created.
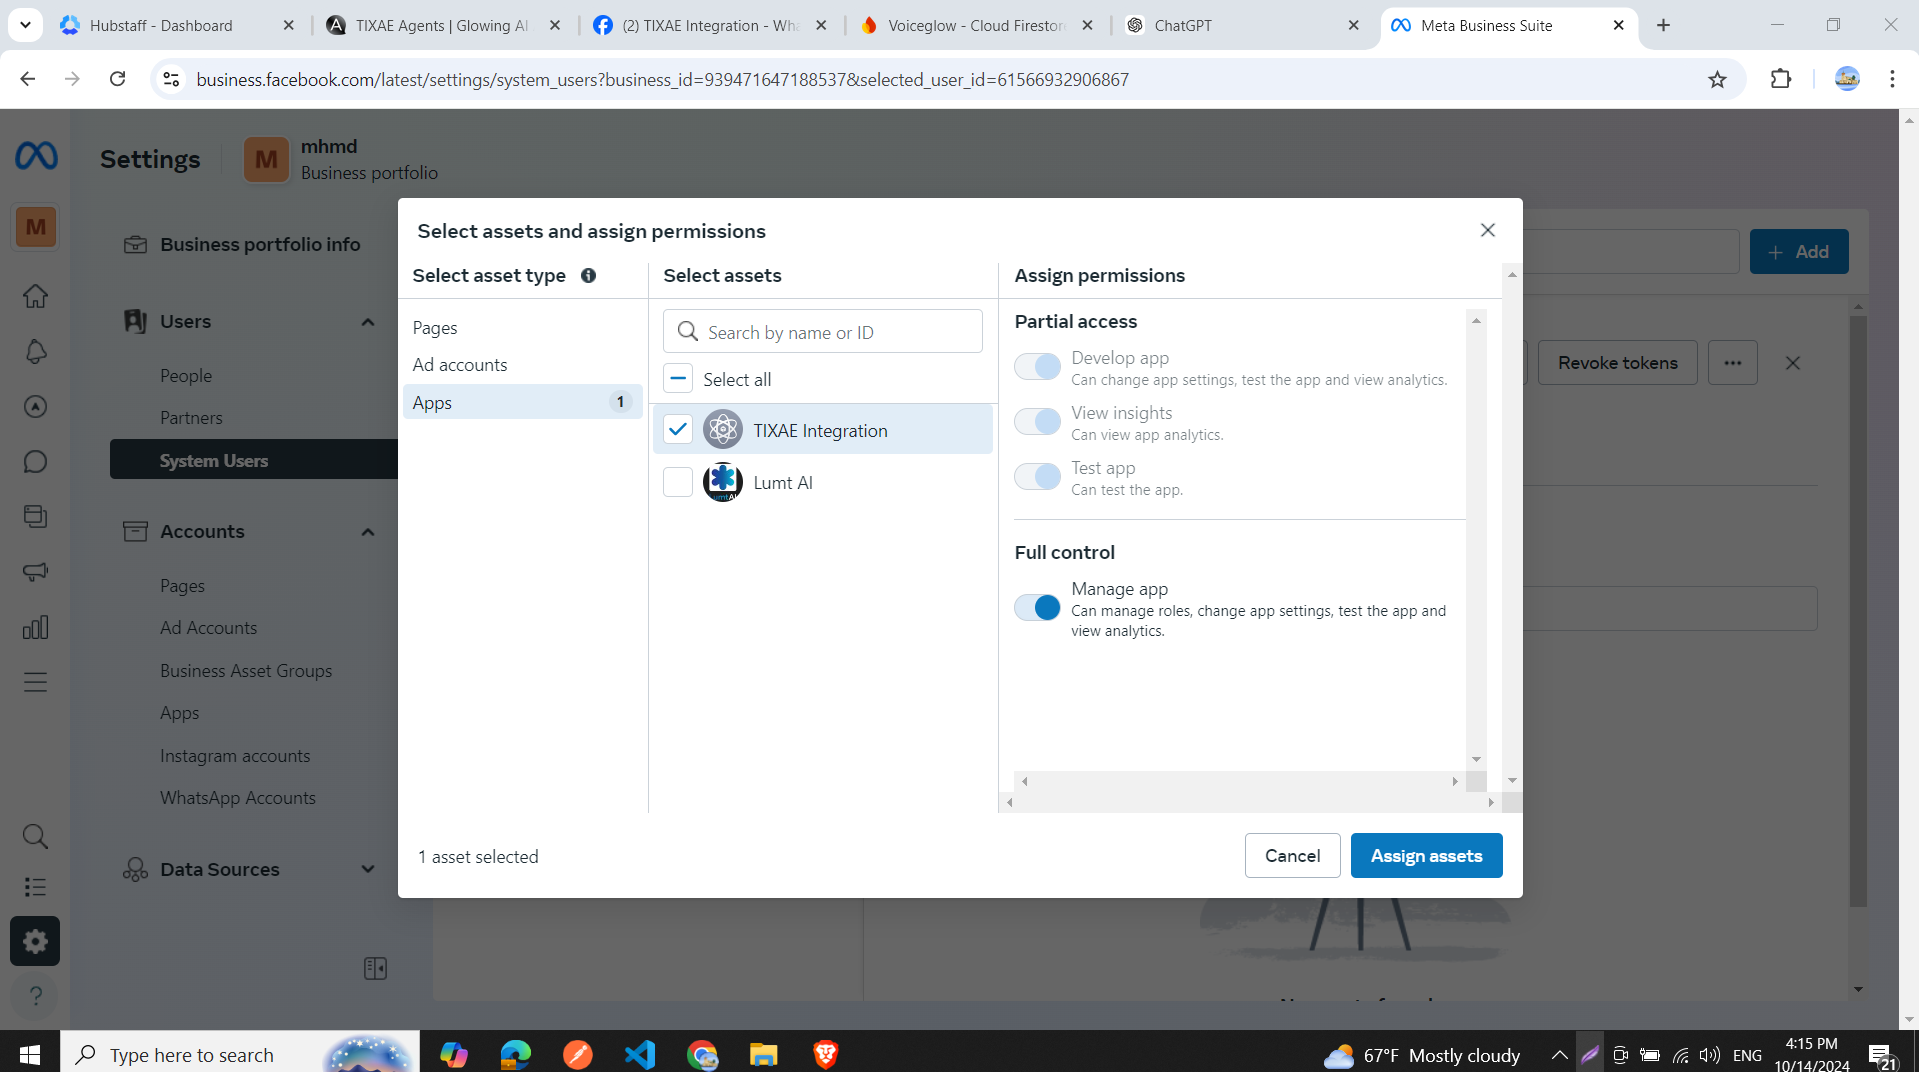
- In the “Assign Permissions” tab, select “Full Control”.
- Click “Assign Assets”.
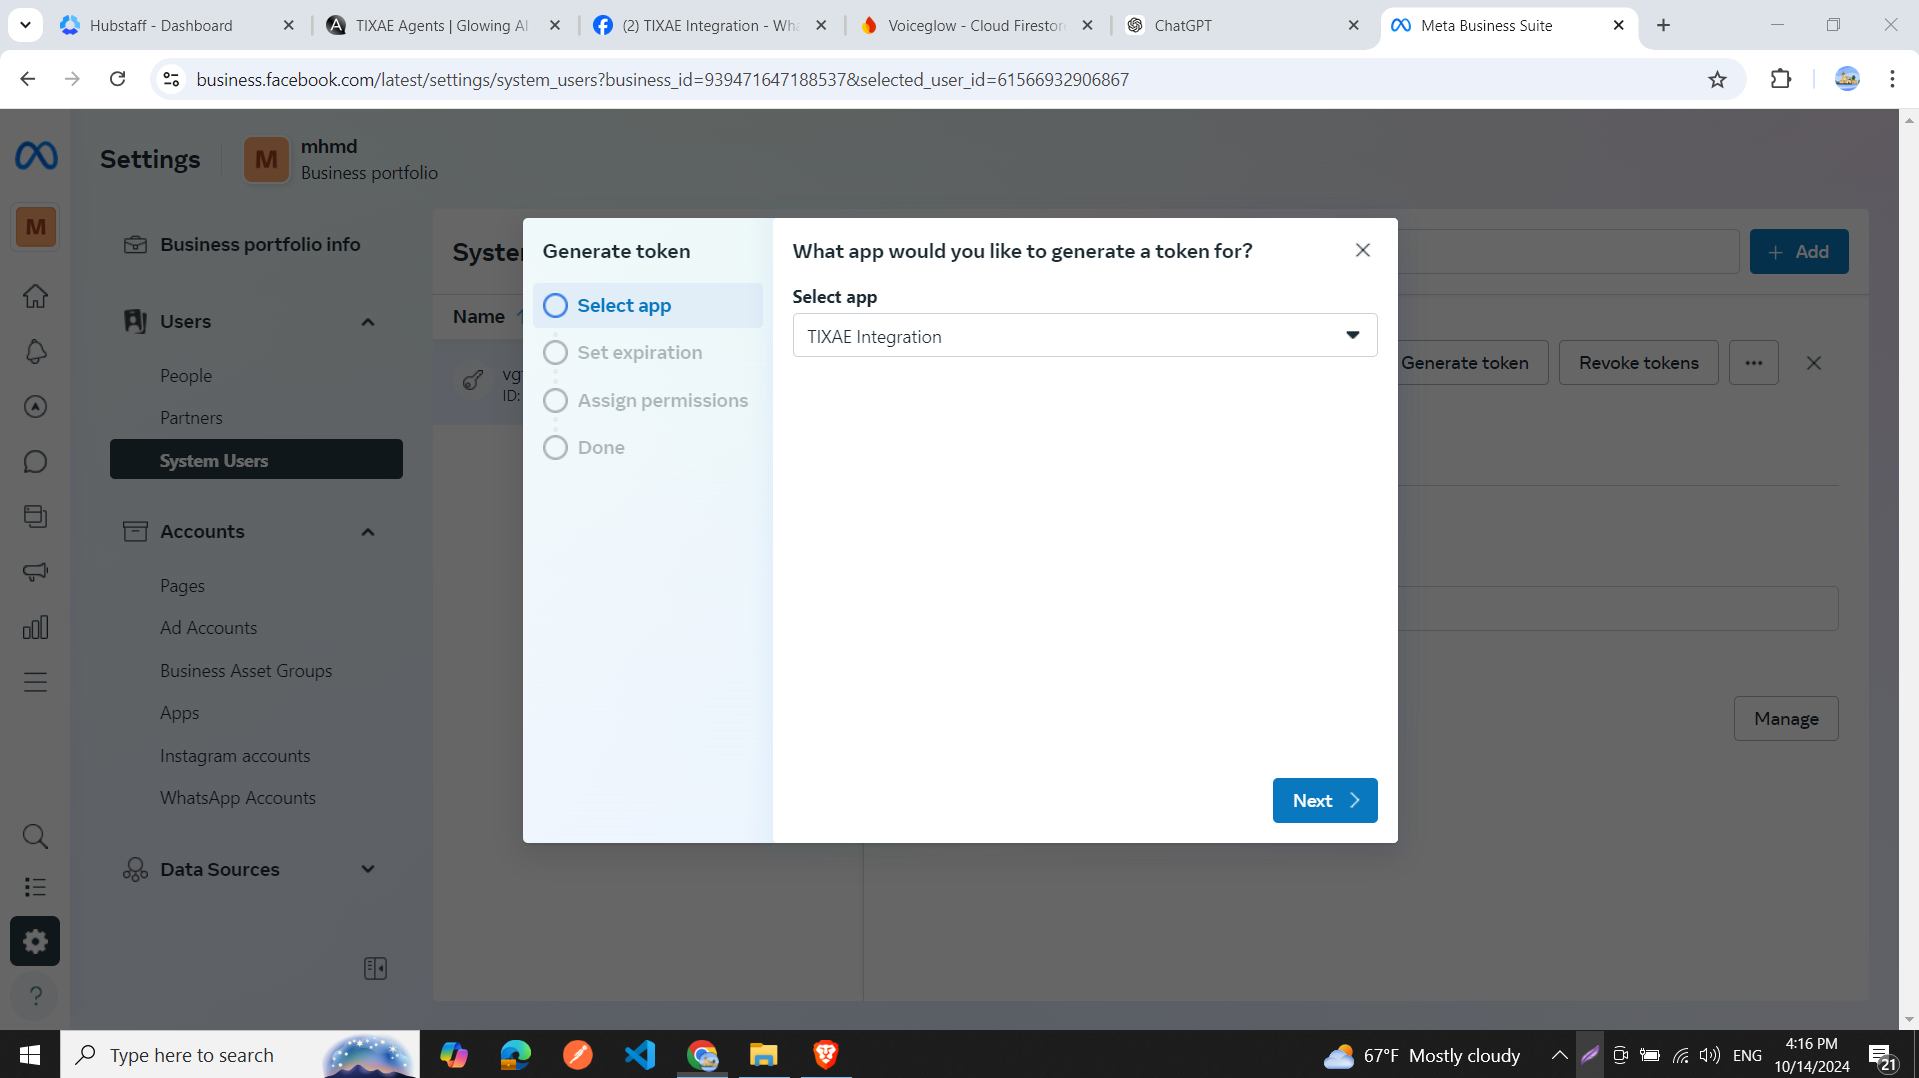
- Click the “Generate Token” button for the system user:
- Select the app you just created and click “Next”.
- Choose “Never” for token expiration and click “Next”.
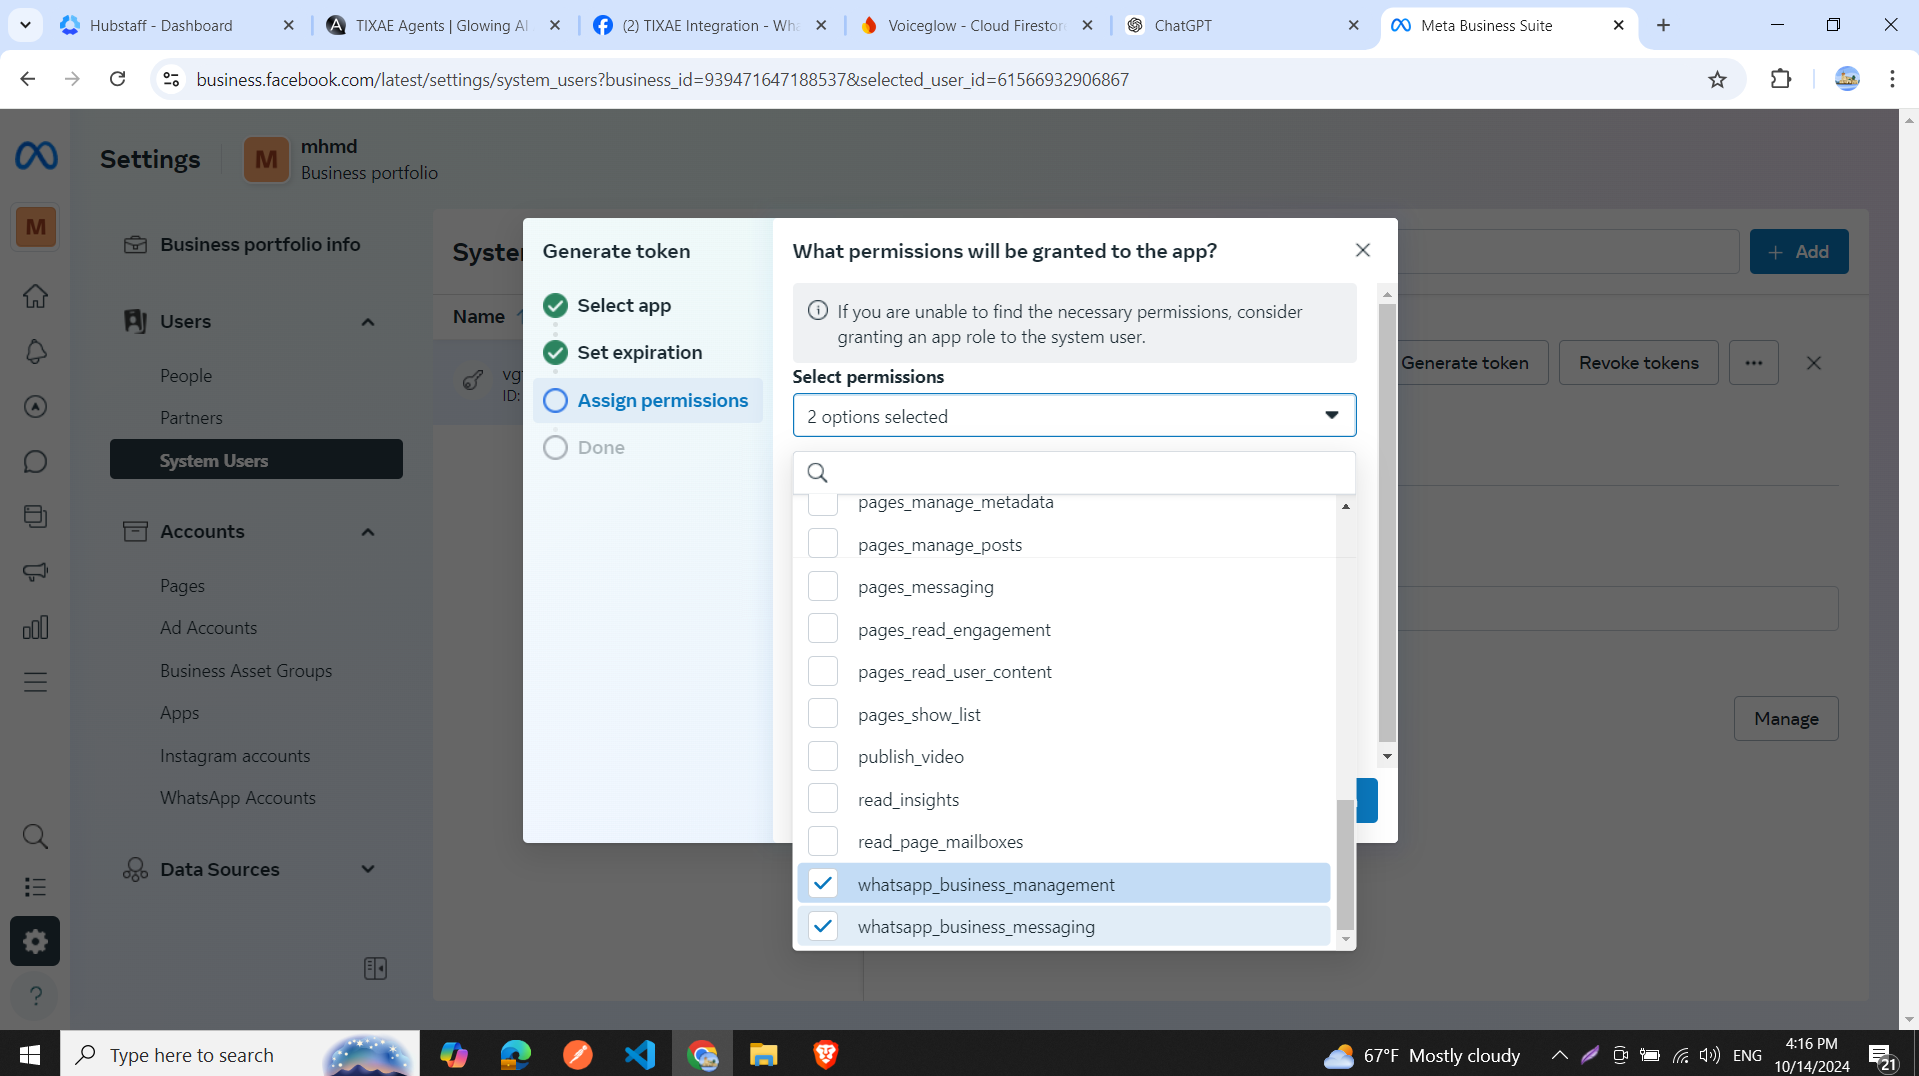
- In permissions, select “whatsapp_business_management” and “whatsapp_business_messaging”.
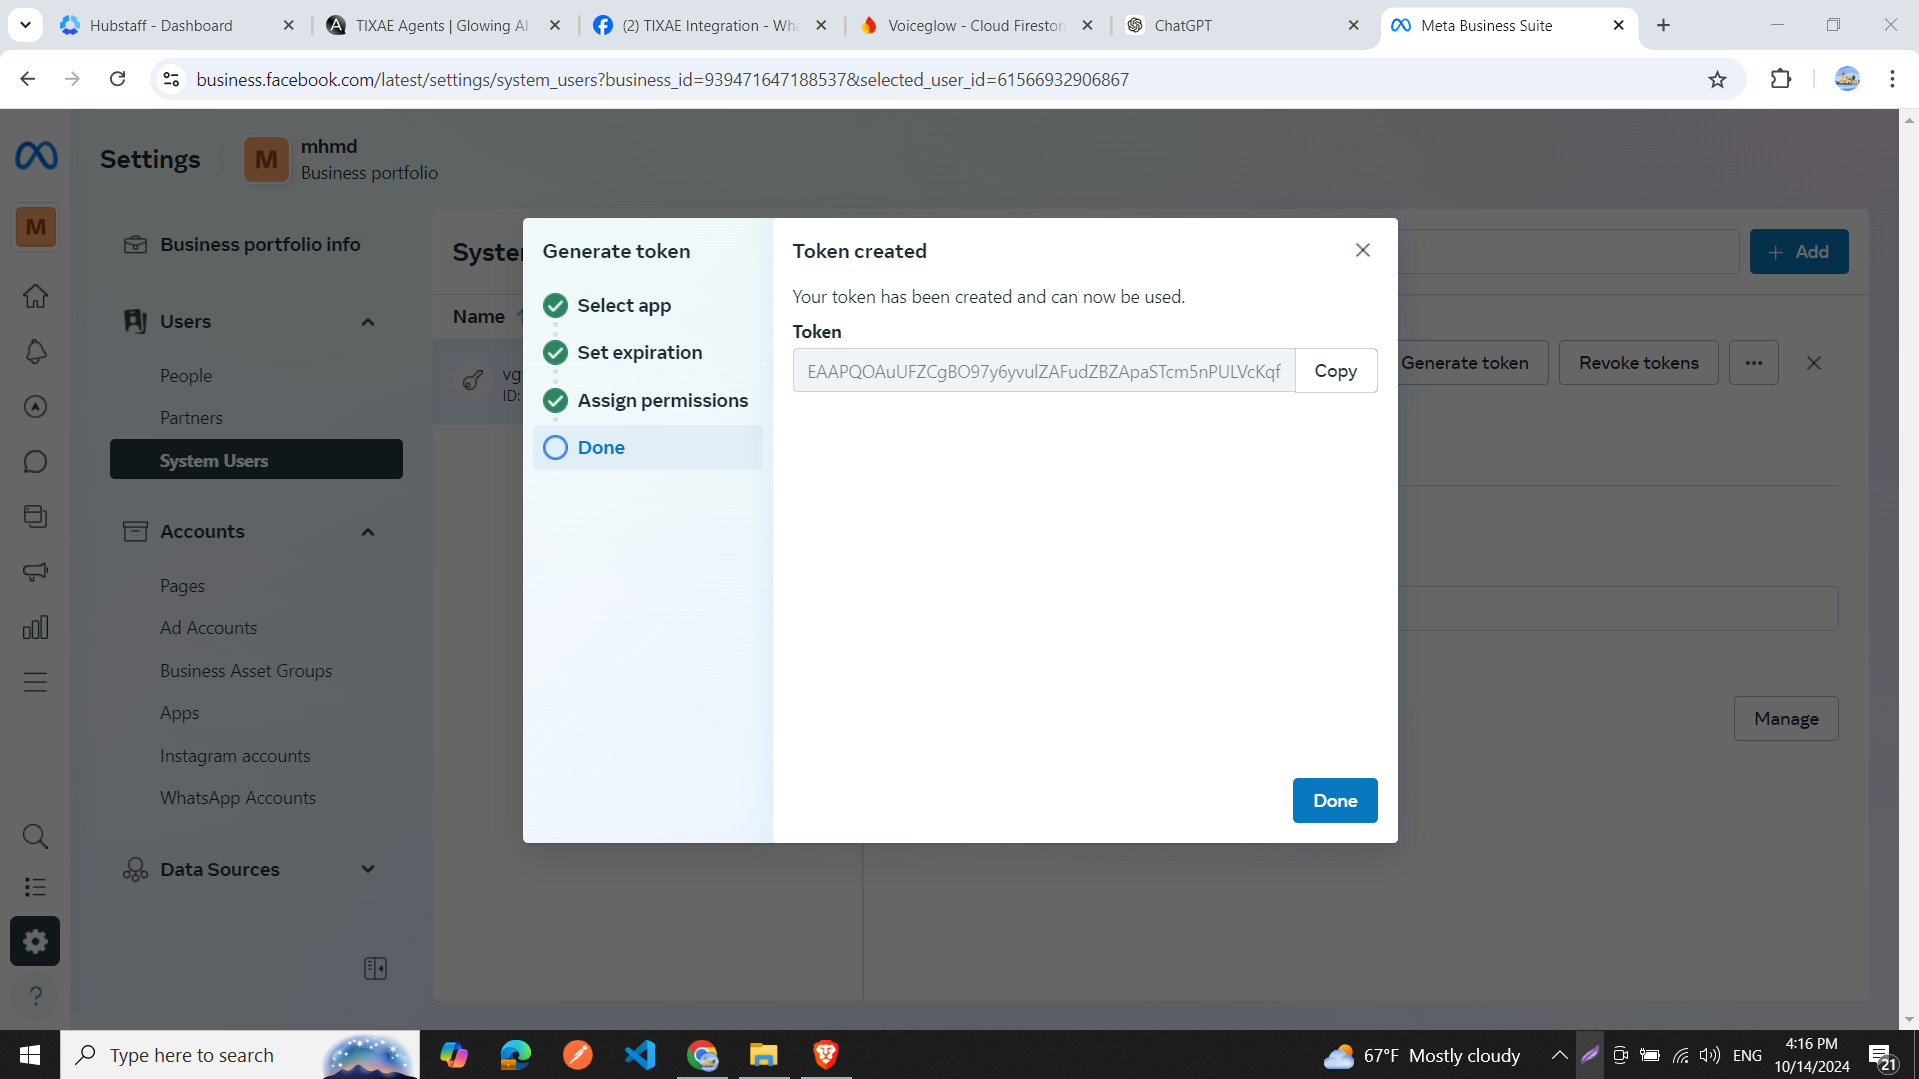
- Click “Next”, then “Copy” the generated token, and click “Done”.

Step 5: Update Token and Test Integration
- Return to developers.facebook.com/apps/.
- In your app’s API Setup window, paste the new permanent token in the Access Token field.
- Update the token in the Convocore integration window with this new permanent token.
- Send a message from your phone to the test WhatsApp number.
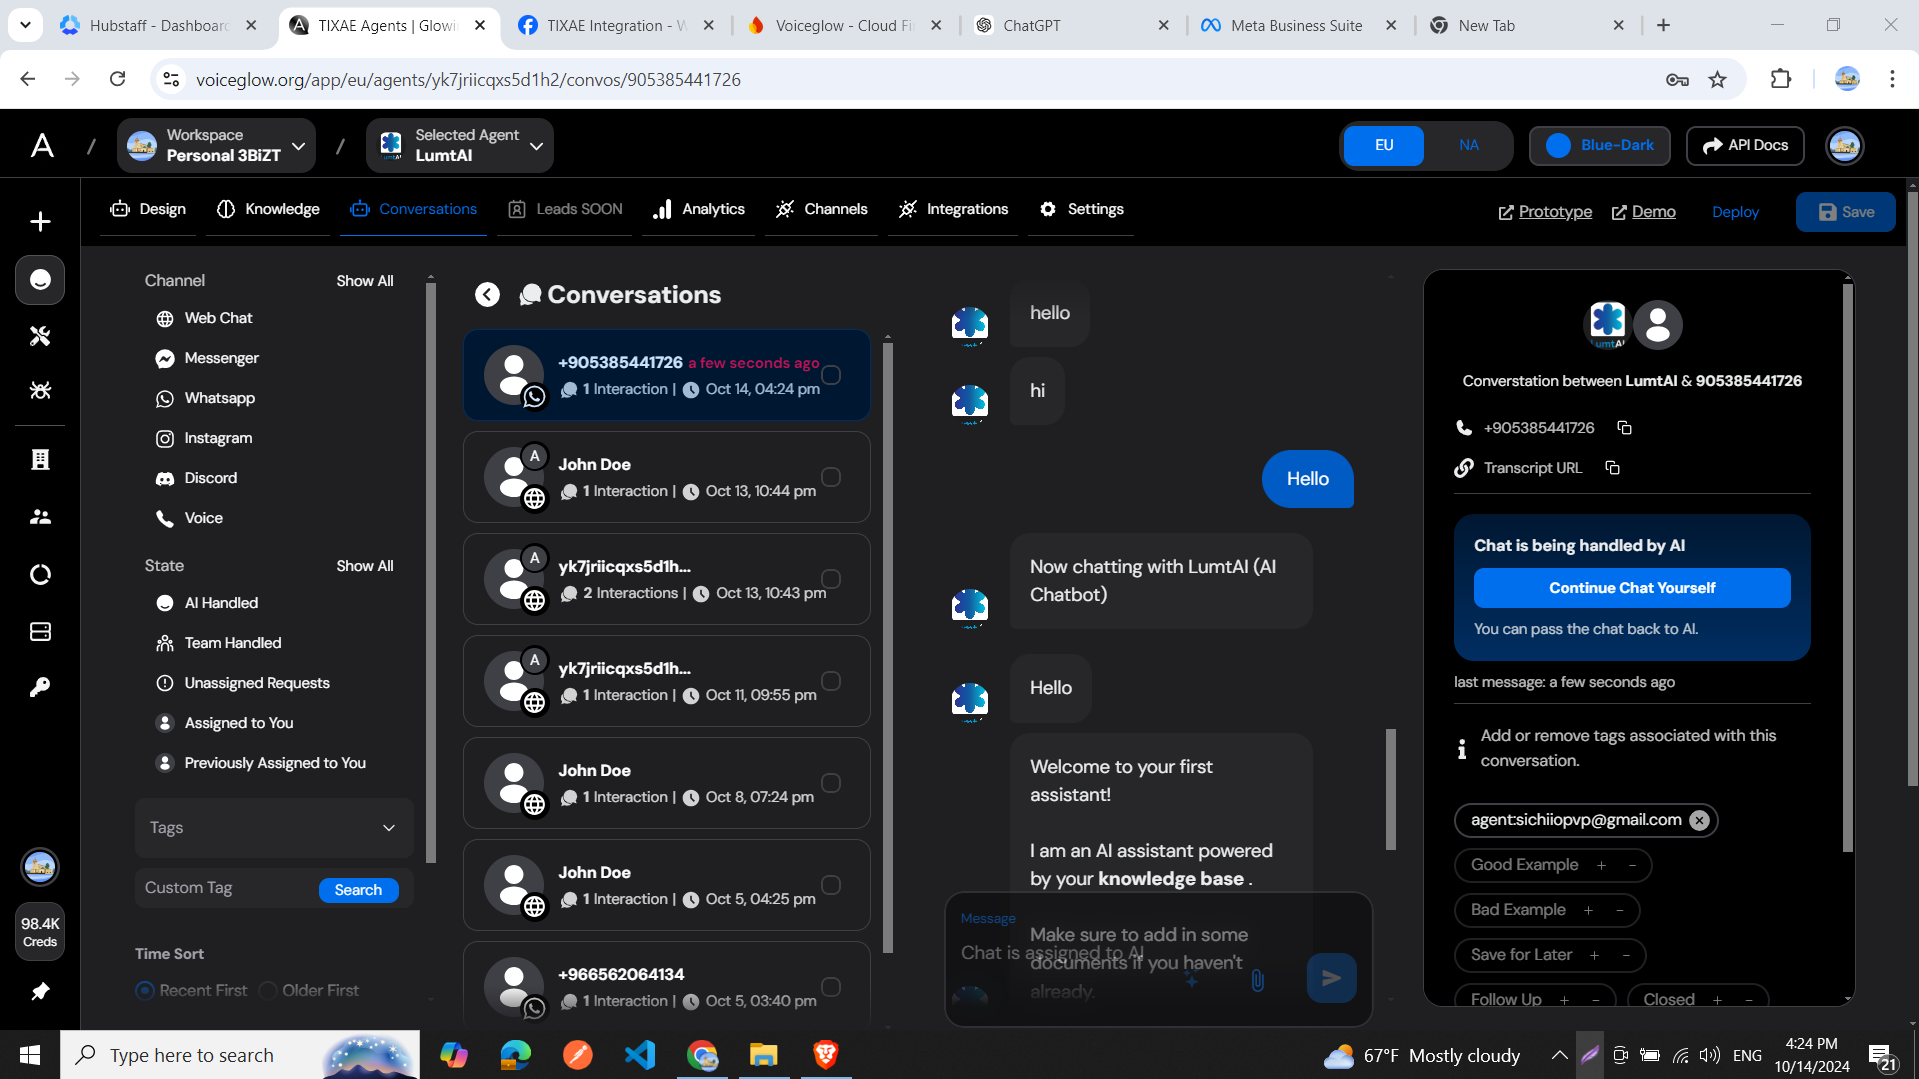
- Check the Convocore conversations window to see if the message appears.

You can follow the same steps to connect a WhatsApp Business account to your
Convocore agent. images are provided in the tutorial for each step.
Learn More
- This tutorial video provides a comprehensive guide on connecting WhatsApp to your Convocore agent: