> ## Documentation Index
> Fetch the complete documentation index at: https://docs.convocore.ai/llms.txt
> Use this file to discover all available pages before exploring further.
# Getting Started
> A comprehensive guide to setting up your agency dashboard and managing clients in a white-labeled service.
## What is Whitelabeling?
White-labeling in Convocore allows agencies to fully customize the chatbot experience under their own branding. This feature provides the flexibility for agencies to present the chatbot as part of their brand while managing multiple clients seamlessly.
### Key Benefits of White-Labeling
* **Brand Customization:** Customize the dashboard, chat interfaces, and client interactions to align with your brand.
* **Enhanced Client Relationships:** Offer a branded experience that makes your clients feel directly supported by your agency.
* **Efficient Management:** Use a single platform to manage multiple clients, chatbots, and user interactions without revealing third-party tools.
## White-Labeling in Convocore
The Convocore platform supports robust white-labeling features tailored for agencies, including client management, team access controls, and chat monitoring. Agencies can integrate AI-powered chatbots into their service offerings, enhancing value and engagement with each client.
## Prerequisites
Before you begin, ensure you have:
* A registered account with Convocore.
* Necessary permissions and subscription to create and manage agency dashboards.
## Step 1: Creating Your Agency Dashboard
### 1. Log In to Convocore
Log in to your [Convocore](https://convocore.ai/) account. Upon logging in, navigate to the **Agency tab** where you can begin creating your branded agency dashboard.
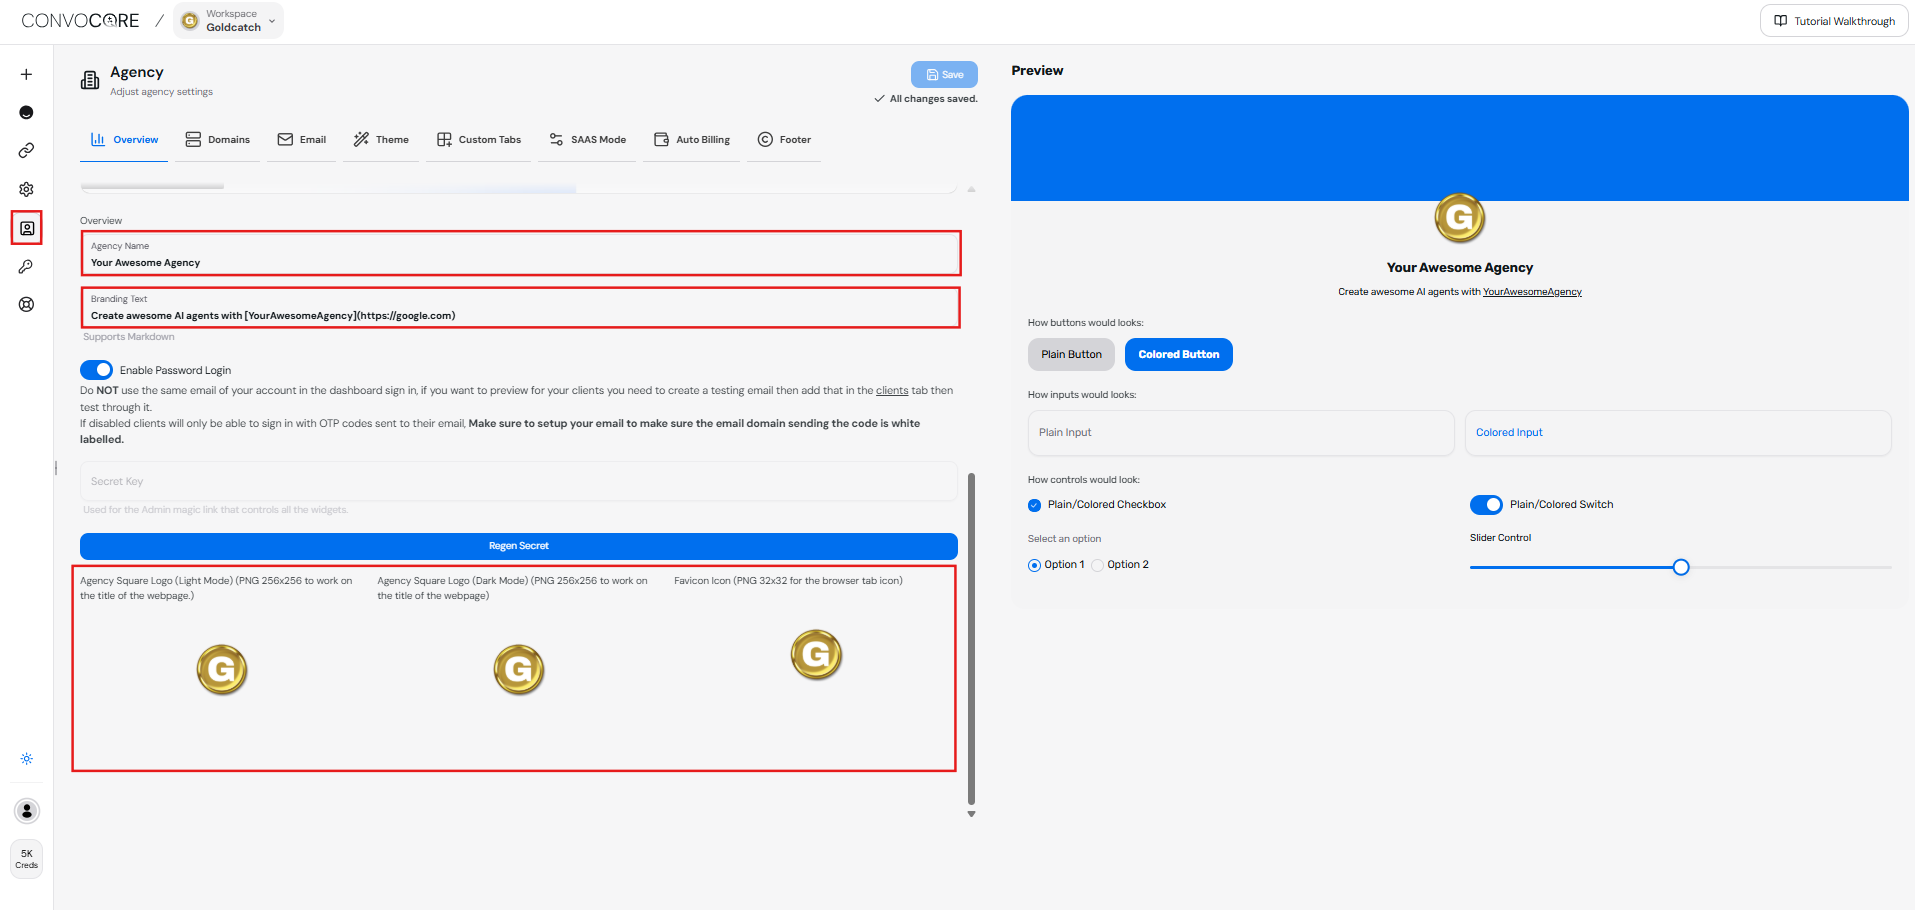
### 2. Add Your Agency Information
In the **Agency tab**, add your **agency name** and a **brand tagline/description**. This helps personalize the dashboard for your agency. You can also add your agency logos for light mode, dark mode, and browser icon
 ***
### 3. Set Up Your Domain
In the **Domain dropdown**, you have two options:
* **Create Subdomain**: Choose this option if you want to use a subdomain under Convocore.
* **Connect Your Own Domain**: If you already have a domain, you can connect it here.
To access premium features, consider subscribing to our paid plan.
For this tutorial, we’ll proceed with the **subdomain** option.
***
### 3. Set Up Your Domain
In the **Domain dropdown**, you have two options:
* **Create Subdomain**: Choose this option if you want to use a subdomain under Convocore.
* **Connect Your Own Domain**: If you already have a domain, you can connect it here.
To access premium features, consider subscribing to our paid plan.
For this tutorial, we’ll proceed with the **subdomain** option.
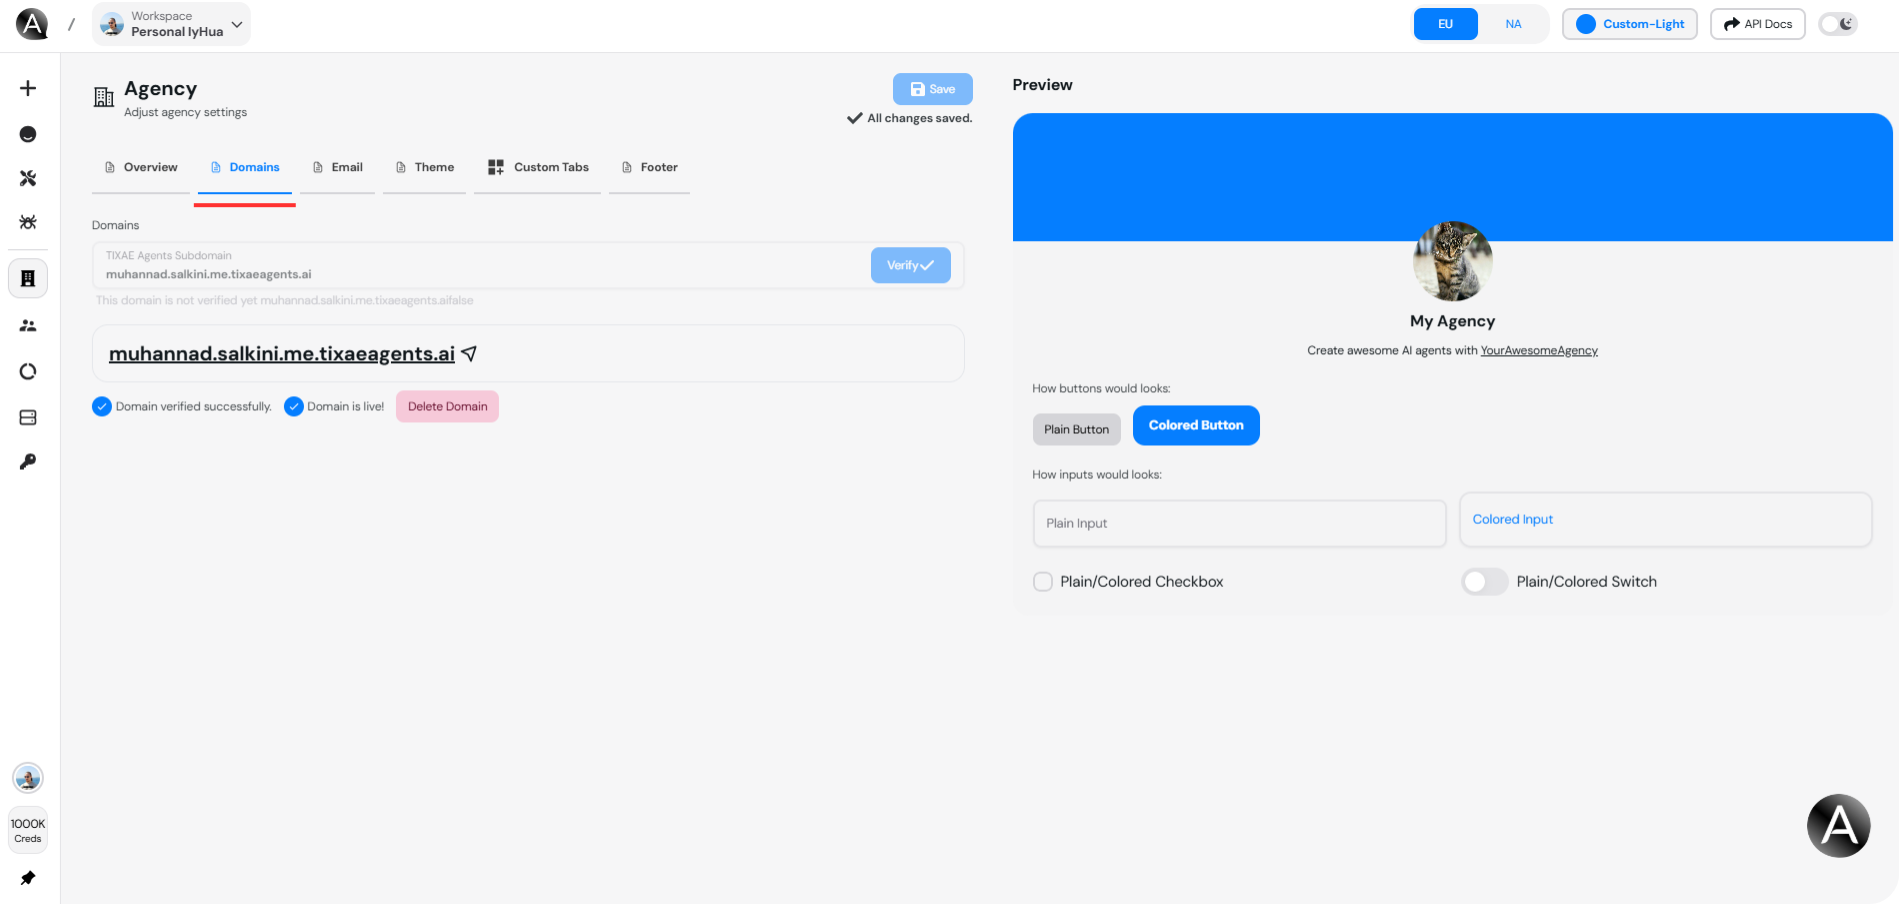 * Click on **Verify** to check whether the chosen subdomain name is available. If it's available, you can proceed.
***
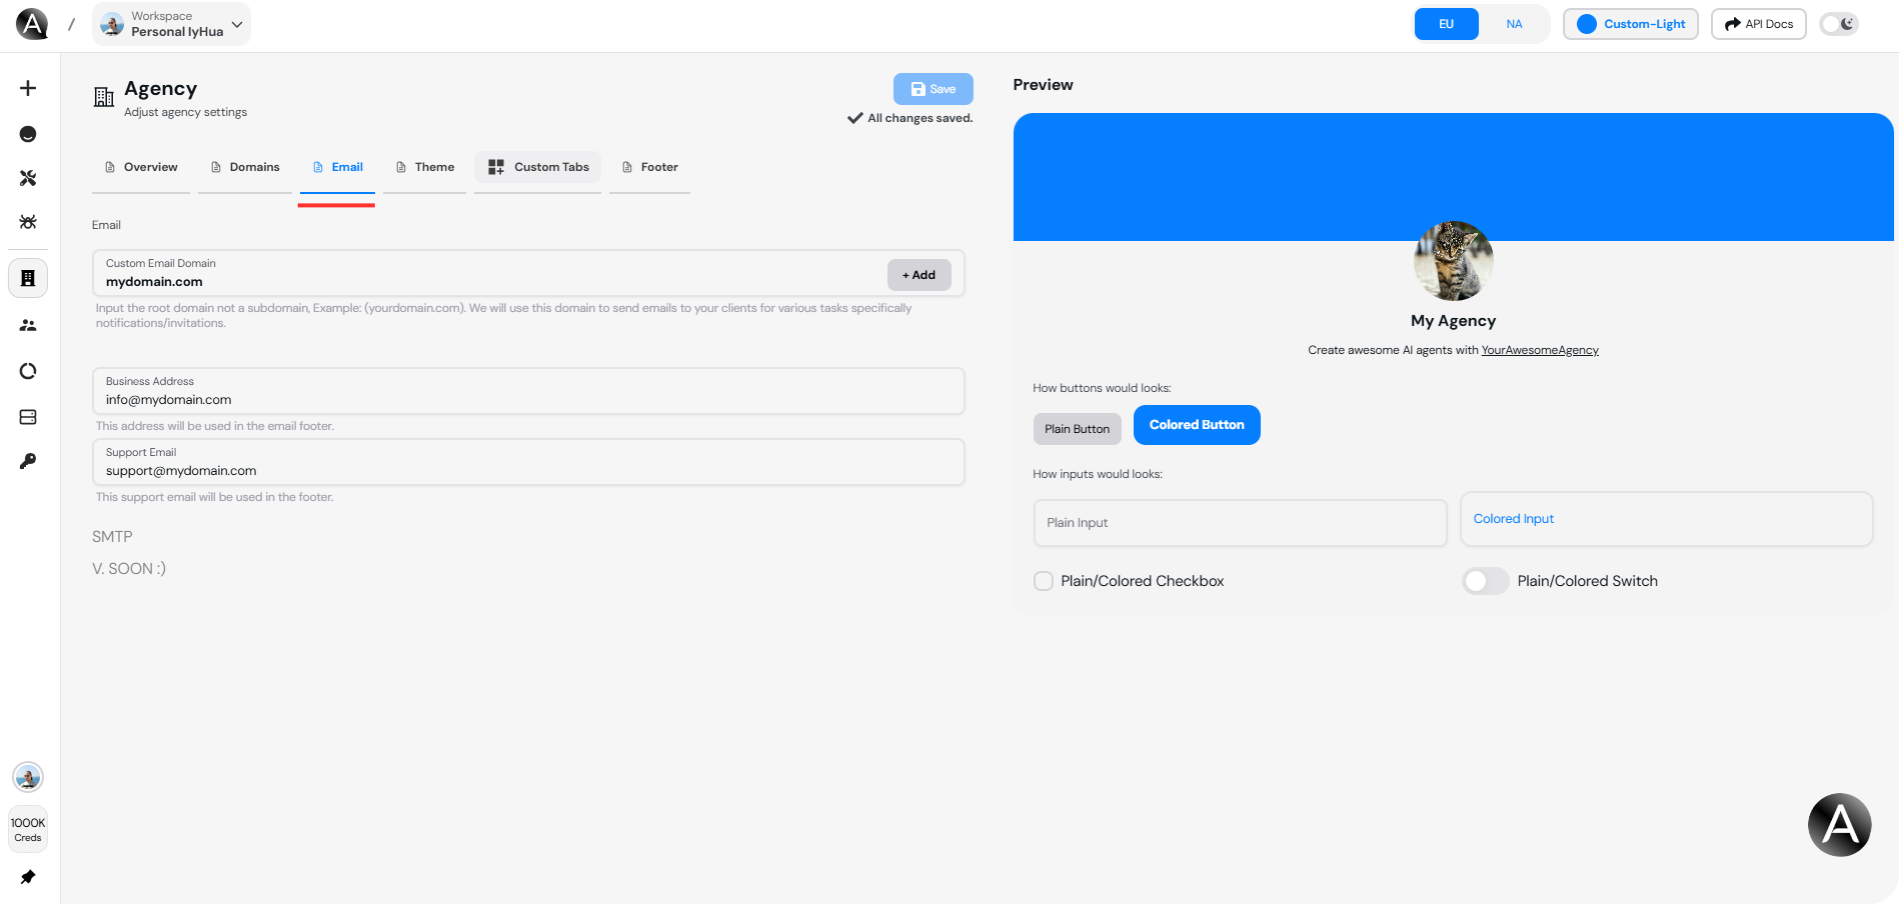
### 4. Adding Your Own Email
In this step, you will add your agency's email address, which will be used for communication with clients and for notifications related to the agency dashboard. This email will also serve as the primary contact point for any inquiries or support requests.
* Enter your agency domain address in the designated field, then click on the **Add** button. After that, add the credentials to your domain provider dashboard.
* Enter your agency email address.
Ensure that the email address is valid and regularly monitored to maintain effective
communication with your clients.
* Click on **Verify** to check whether the chosen subdomain name is available. If it's available, you can proceed.
***
### 4. Adding Your Own Email
In this step, you will add your agency's email address, which will be used for communication with clients and for notifications related to the agency dashboard. This email will also serve as the primary contact point for any inquiries or support requests.
* Enter your agency domain address in the designated field, then click on the **Add** button. After that, add the credentials to your domain provider dashboard.
* Enter your agency email address.
Ensure that the email address is valid and regularly monitored to maintain effective
communication with your clients.
 ***
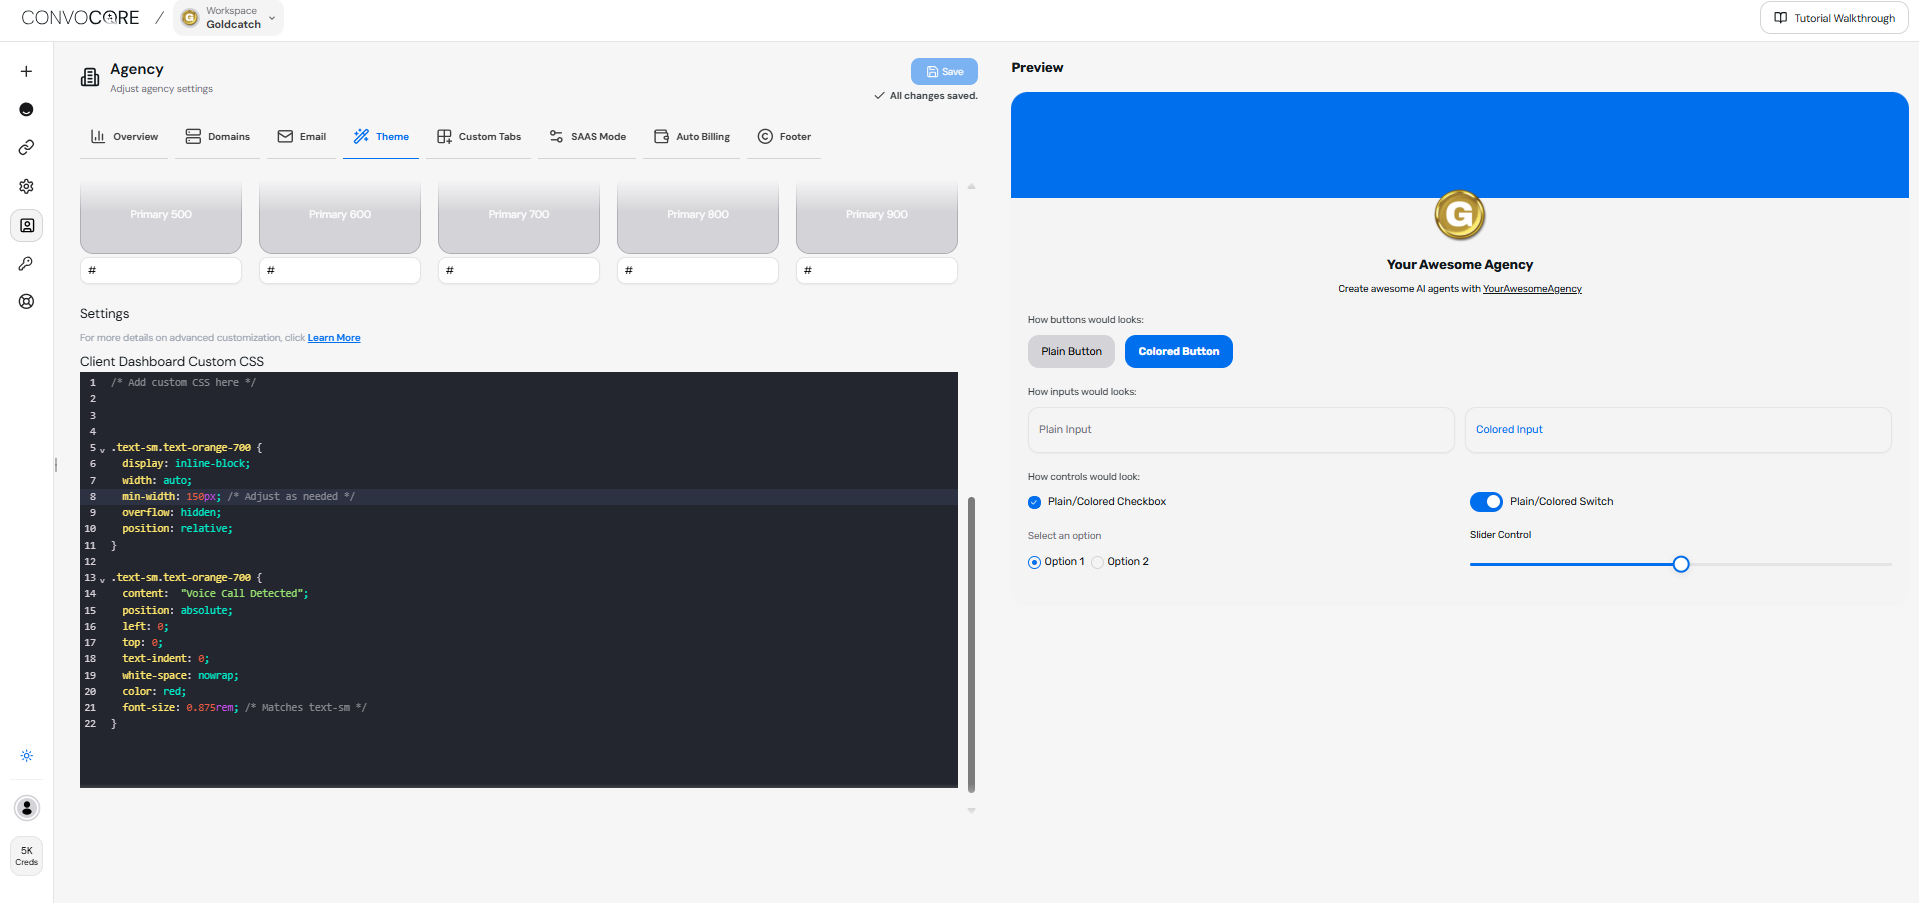
### 5. Customize Your Dashboard Theme
In the **Theme** section, you can:
* Select **brand colors**.
* Choose **fonts** that align with your agency's branding.
This will ensure that the dashboard has a consistent look and feel with your brand.
***
### 5. Customize Your Dashboard Theme
In the **Theme** section, you can:
* Select **brand colors**.
* Choose **fonts** that align with your agency's branding.
This will ensure that the dashboard has a consistent look and feel with your brand.
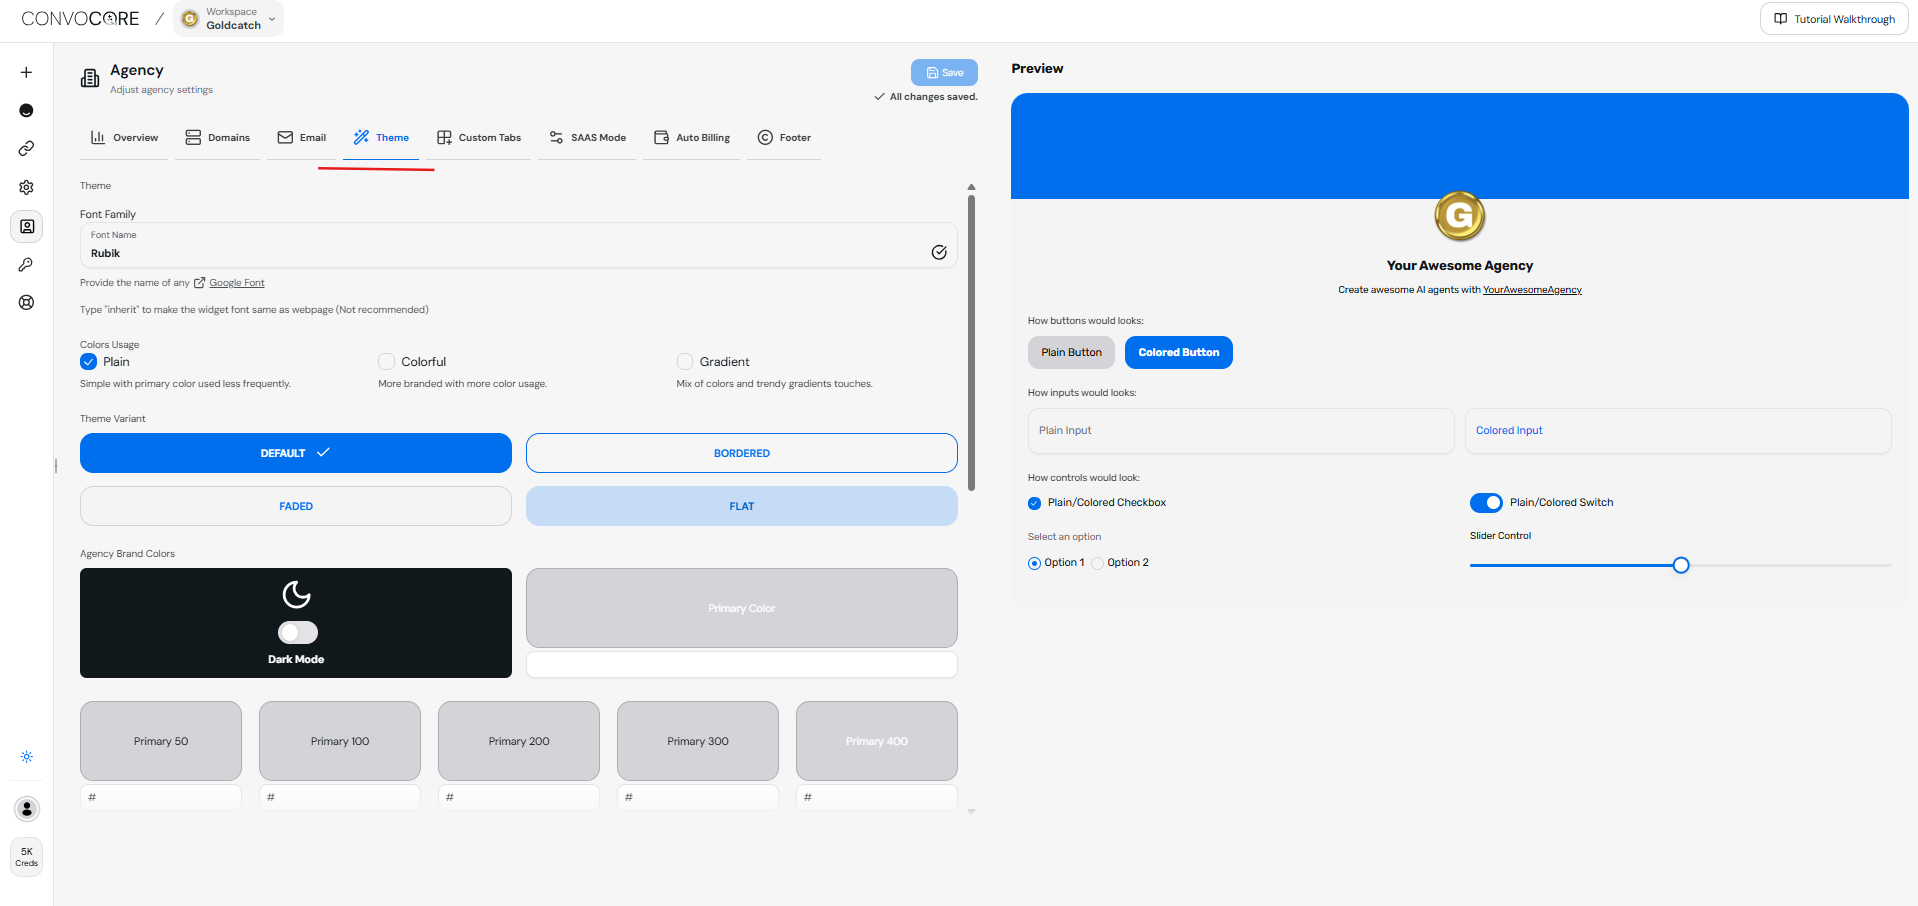 * Add **custom CSS** in the Client Dashboard Custom CSS editor to further customize the appearance of your dashboard. This allows you to apply advanced styling to specific elements and create a fully branded experience.
 ***
### 6. Update Footer Settings
In the **Footer** section, you can add important links, including:
* **Agency website**.
* **Agency email**.
* **Privacy policy** and other legal links.
Once you finish setting up your agency, make sure to click **Save**.
For a detailed walkthrough on setting up an agency dashboard, refer to [this tutorial
video](https://youtu.be/ERWIRhId60A?si=6OHs08gjdifDSweV).
***
## Step 2: Adding and Managing Clients
1. **Navigate to the Client Tab** and click on **New Client** to add a new client.
***
### 6. Update Footer Settings
In the **Footer** section, you can add important links, including:
* **Agency website**.
* **Agency email**.
* **Privacy policy** and other legal links.
Once you finish setting up your agency, make sure to click **Save**.
For a detailed walkthrough on setting up an agency dashboard, refer to [this tutorial
video](https://youtu.be/ERWIRhId60A?si=6OHs08gjdifDSweV).
***
## Step 2: Adding and Managing Clients
1. **Navigate to the Client Tab** and click on **New Client** to add a new client.
 2. Input the client’s **name** and **logo**.
 If the client has a team, select **Organization** to add team members.
***
## Step 3: Assigning Chatbots to Clients
1. Assign specific chatbots to clients by **dragging widgets** to the designated client.
If the client has a team, select **Organization** to add team members.
***
## Step 3: Assigning Chatbots to Clients
1. Assign specific chatbots to clients by **dragging widgets** to the designated client.
 2. Configure the chatbot settings to align with the client’s needs.
***
## Step 4: Adding a Team Member
1. Click on **Manage** and then click on **Add User** to add a team member.
2. Fill in the team member's **name** and **email**, then click **Add User**.
2. Configure the chatbot settings to align with the client’s needs.
***
## Step 4: Adding a Team Member
1. Click on **Manage** and then click on **Add User** to add a team member.
2. Fill in the team member's **name** and **email**, then click **Add User**.
 You can assign this user as an **admin** and provide necessary permissions for their
role.
***
## Step 5: Team Member Log-in
1. Click on the log-in icon or provide the password and email to the client with your dashboard link.
You can assign this user as an **admin** and provide necessary permissions for their
role.
***
## Step 5: Team Member Log-in
1. Click on the log-in icon or provide the password and email to the client with your dashboard link.
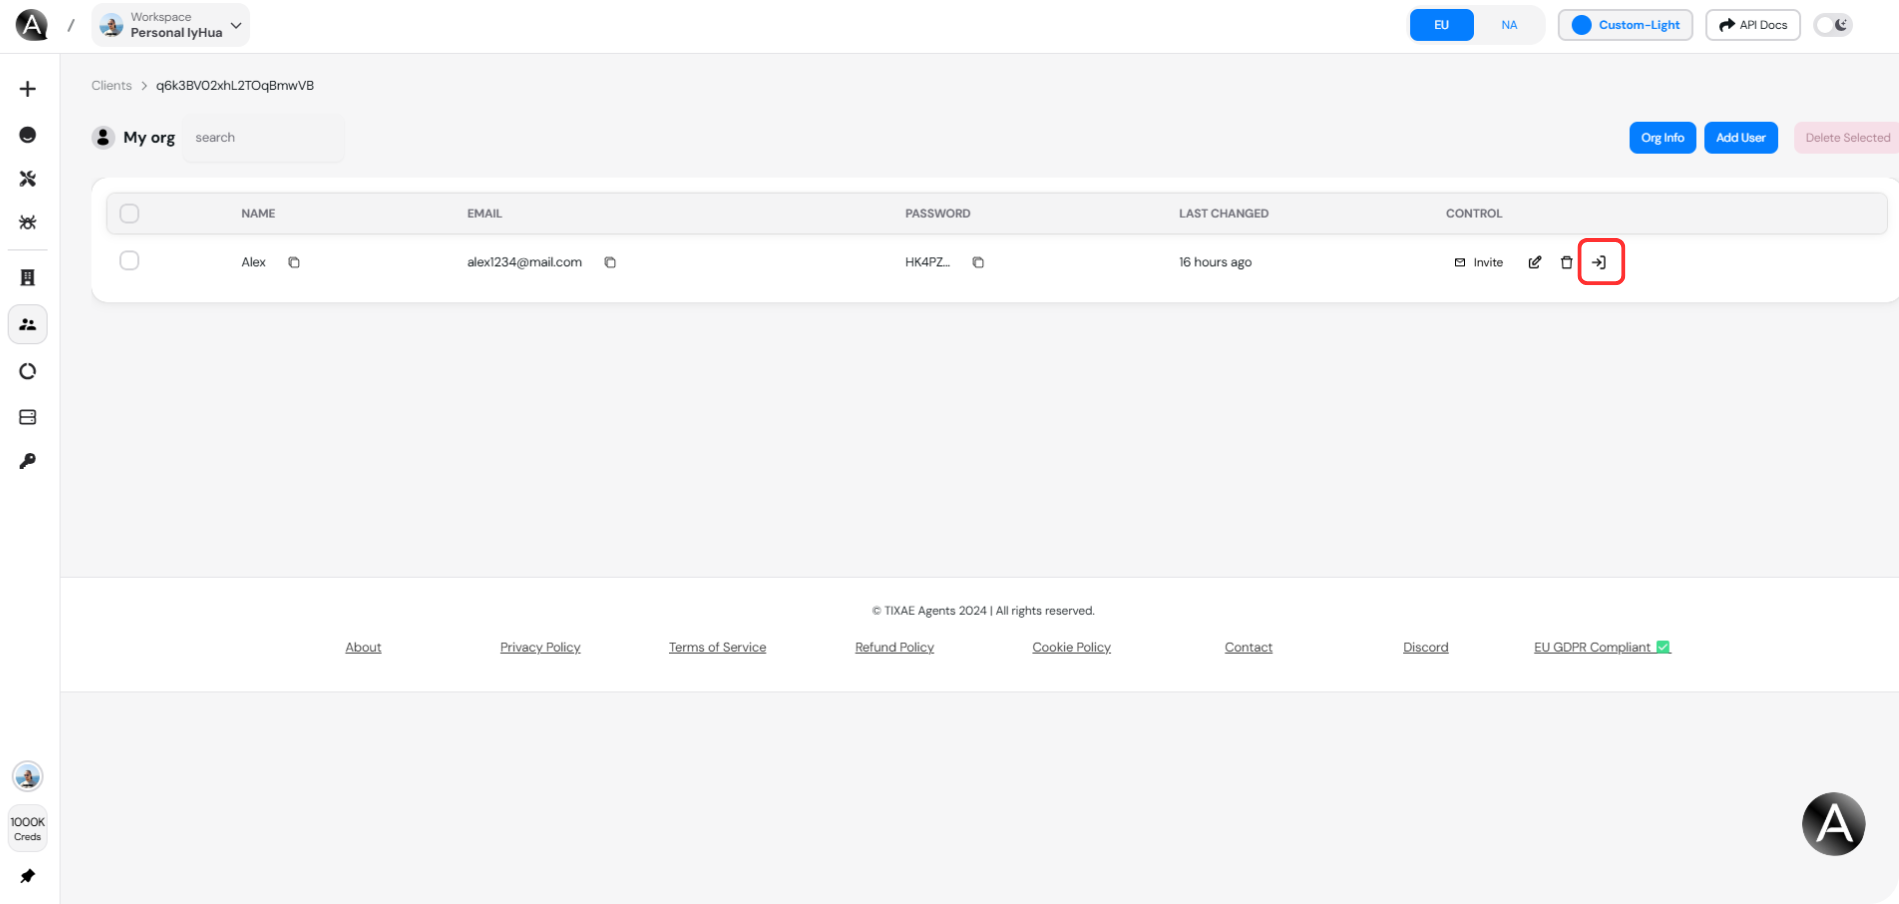 You can send an invitation email to the team member using the invite button in the
control section.
## Step 6: Navigating the Dashboard
Once you log in, here’s a quick overview of the key sections:
* **Home**: View general performance statistics.
* **Prompt**: This tab allows you to customize the prompts that the chatbot uses to engage with users, enhancing the interaction quality.
* **Knowledge Base**: You can feed data to the chatbot through formats like text files, sitemaps, FAQs, or web pages.
* **Conversations Tab**: Access the **chat history** between users and the AI chatbot.
* **Analytics Tab**: Get live reports on interaction data, user retention, and chatbot performance.
* **Channels Tab**: Manage the various communication channels through which users can interact with the chatbot, ensuring a seamless experience across platforms.
* **Settings Tab**: Customize the settings for your chat widget and chatbot.
You can send an invitation email to the team member using the invite button in the
control section.
## Step 6: Navigating the Dashboard
Once you log in, here’s a quick overview of the key sections:
* **Home**: View general performance statistics.
* **Prompt**: This tab allows you to customize the prompts that the chatbot uses to engage with users, enhancing the interaction quality.
* **Knowledge Base**: You can feed data to the chatbot through formats like text files, sitemaps, FAQs, or web pages.
* **Conversations Tab**: Access the **chat history** between users and the AI chatbot.
* **Analytics Tab**: Get live reports on interaction data, user retention, and chatbot performance.
* **Channels Tab**: Manage the various communication channels through which users can interact with the chatbot, ensuring a seamless experience across platforms.
* **Settings Tab**: Customize the settings for your chat widget and chatbot.
 ***
## Step 7: Monitoring Client Dashboards and Chat Activity
Team members can:
* **Monitor chatbot status** (online/offline).
* **Handle conversations** directly or pass chats between the team and AI.
You need to enable the [Live-Handoff](/features/live-handoff) option to use this
feature.
***
## Best Practices
* Regularly update your agency information to keep clients informed.
* Monitor chatbot interactions to improve user engagement.
***
## Step 7: Monitoring Client Dashboards and Chat Activity
Team members can:
* **Monitor chatbot status** (online/offline).
* **Handle conversations** directly or pass chats between the team and AI.
You need to enable the [Live-Handoff](/features/live-handoff) option to use this
feature.
***
## Best Practices
* Regularly update your agency information to keep clients informed.
* Monitor chatbot interactions to improve user engagement.