> ## Documentation Index
> Fetch the complete documentation index at: https://docs.convocore.ai/llms.txt
> Use this file to discover all available pages before exploring further.
# Gmail Integration
> Connect your Gmail account to let your agent read and reply to emails automatically.
## Overview
The Gmail integration allows your AI agent to:
1. Read incoming emails from your connected Gmail account.
2. Determine if a reply is needed based on the email content.
3. Automatically send a reply on your behalf.
## Setup Guide
### 1. Connect your Gmail Account
First, you need to authorize the application to access your Gmail account.
1. Navigate to **Integrations** in the side menu.
2. Select **Functions**.
3. Click on **Gmail**.
4. Follow the prompts to connect your Gmail account.
### 2. Enable Email Channel for your Agent
Once your account is connected, you need to enable the email channel for the specific agent you want to handle your emails.
1. Go to your **Agent** dashboard.
2. Navigate to **Channels**.
3. Select the **Email** channel.
4. Toggle the switch to **Enable**.
5. Click **Add Email** and select the Gmail account you connected earlier.
### 3. Configure Reply Settings
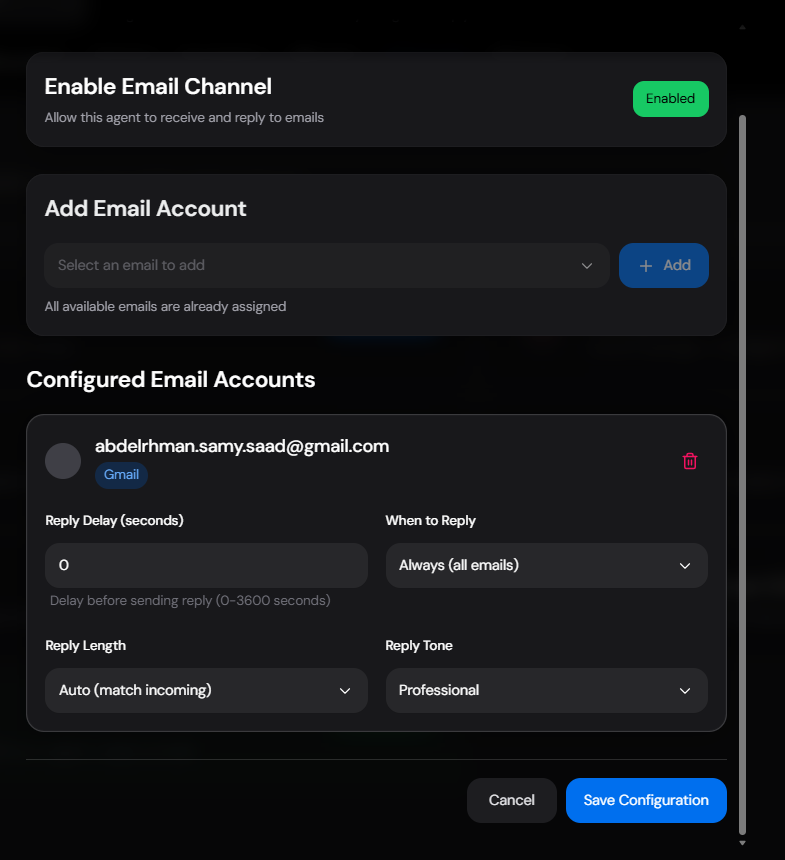
After adding the email, click **Configure** to customize how the agent handles emails.
* **Reply Delay**: Set a delay (in seconds) before the agent sends a reply. This can make the response feel more natural.
* **When to Reply**: Choose which emails the agent should reply to (e.g., "Always").
* **Reply Length**: Adjust the length of the generated response.
* **Reply Tone**: Set the tone of the response (e.g., "Professional").
Click **Save Configuration** to apply your changes.
 * **Reply Delay**: Set a delay (in seconds) before the agent sends a reply. This can make the response feel more natural.
* **When to Reply**: Choose which emails the agent should reply to (e.g., "Always").
* **Reply Length**: Adjust the length of the generated response.
* **Reply Tone**: Set the tone of the response (e.g., "Professional").
Click **Save Configuration** to apply your changes.
* **Reply Delay**: Set a delay (in seconds) before the agent sends a reply. This can make the response feel more natural.
* **When to Reply**: Choose which emails the agent should reply to (e.g., "Always").
* **Reply Length**: Adjust the length of the generated response.
* **Reply Tone**: Set the tone of the response (e.g., "Professional").
Click **Save Configuration** to apply your changes.